The life and times of Merry Khaos and her alter-ego, Kristie Grey. A romp through the inner workings of a mind in roller derby athletics, training, and business management.
1) What pump up song plays in your head when you take the track? I always listen to 96 Quite Bitter Beings by CKY. I used to listen to it before football games in high school and so it still do it to pump me up.
2) What is your favorite city to travel to play derby in? My favorite city to travel to for derby is Vegas. That means I’m at Rollercon!
3) Who is your favorite WFTDA skater and why? All of my fav skaters are on the Wheels of Justice. But if I had to choose another one S.H Long from Denver. She runs nasty defense, and throws a damn good party too.
4) When the team travels, which team mate(s) do you room with? I usually room with Shreddy and Demolition Man. They don’t mind seeing me naked.
5) Which MRDA skater pushes you to be better [because they’ve beaten you in the past]? Magnum PIMP [of St Louis]. He’s the smartest jammer in the MRDA. It’s a chess game with him. So if you outsmart him, you still have to try and block him.
6) What is your favorite post-bout food? Poutine and coconut water.
1) What pump up song plays in your head when you take the track? I’m always rocking out to Anamanaguchi. It’s a couple guitars, drums, and a pair of Nintendo’s. Get’s me in the right mindset and gives me bonus XP after the game. 2) What is your favorite city to travel to play derby in? I love Saint Louis and Saint Louis as far as I can tell loves me too. It’s derby scene is right up my ally, I’ve got a ton of close derby friends there, and they always treat me right. I’m pretty hyped that champs is there this year. I feel at home and know I’m going to have a blast. 3) Who is your favorite WFTDA skater and why? Awwwww man. That’s so tough! I gotta rep my MNRG girls though. Hurtrude Stein from MNRG has had an incredible season. She’s always been a good player but this year she’s really stood out as someone to watch on that team. Every time I see her out there she’s doing exactly what she should be and executing the fuck out of it. She’s one of those skaters I’m hyped to skate against when we scrimmage MNRG. It seems like no matter what the situation she offers me a new challenge. 4) When the team travels, which team mate(s) do you room with? I think the appropriate question would be which team do I room with 😉 I’m kind of a derby gypsy by nature. That approach has had me on couches and floors of more teams than I can remember. Although the number of beers had prior to aforementioned unconsciousness might have something to do with the fuzzy nature of those memories. 5) Which MRDA skater pushes you to be better [because they’ve beaten you in the past]? There are a lot of names on that list. At home Freight Trainand Derbie Monster always play their size against me which is crucial for my progress as a small fry in my sport. Skaters like Magnum and Gnat always seem to be one mental step ahead which I need exposure to keep moving forward.
Of course you’re got your untamed beasts like Feelgood, Steve Sweat, or Shane Bower too. It’s always good to have someone on the other team who just might do something really nuts. It makes me have to throw caution to the wind as you don’t stand a chance if you can’t meet them at their level. 6) What is your favorite post-bout food? Beer. I know it’s not technically food and I’m probably supposed to say candy but after an hour of giving my all I just want a drink. Perhaps a few too many if I can help it.
The Match-Up
Twin City is coming into champs the #14 ranked team, in the slot of the 10 seed; they are excited to learn, grow as a team, and make a case for them to be ranked #10 next time around. Last year at Champs, Bridgetown narrowly lost to SoDisco in the Saturday evening game, thus a chance to play for 5th place. This year, with extra teams shaping the brackets differently, the winner of this first match up will have to beat the St. Louis Gatekeepers, or have Sunday off. Bridgetown does not want to have Sunday off again.
Photo by Ryan Siverson.
Both TC and the Menace have a solid core jammer rotation, with subs they can throw in based on performance. Both teams play with positional walls, and tornado-type recycling. Bridgetown has the upper hand in the area of experience, but this should be a fun first match up of the weekend.
Tune in on WFTDA.tv at 9a CST, Saturday October 17, 2015.
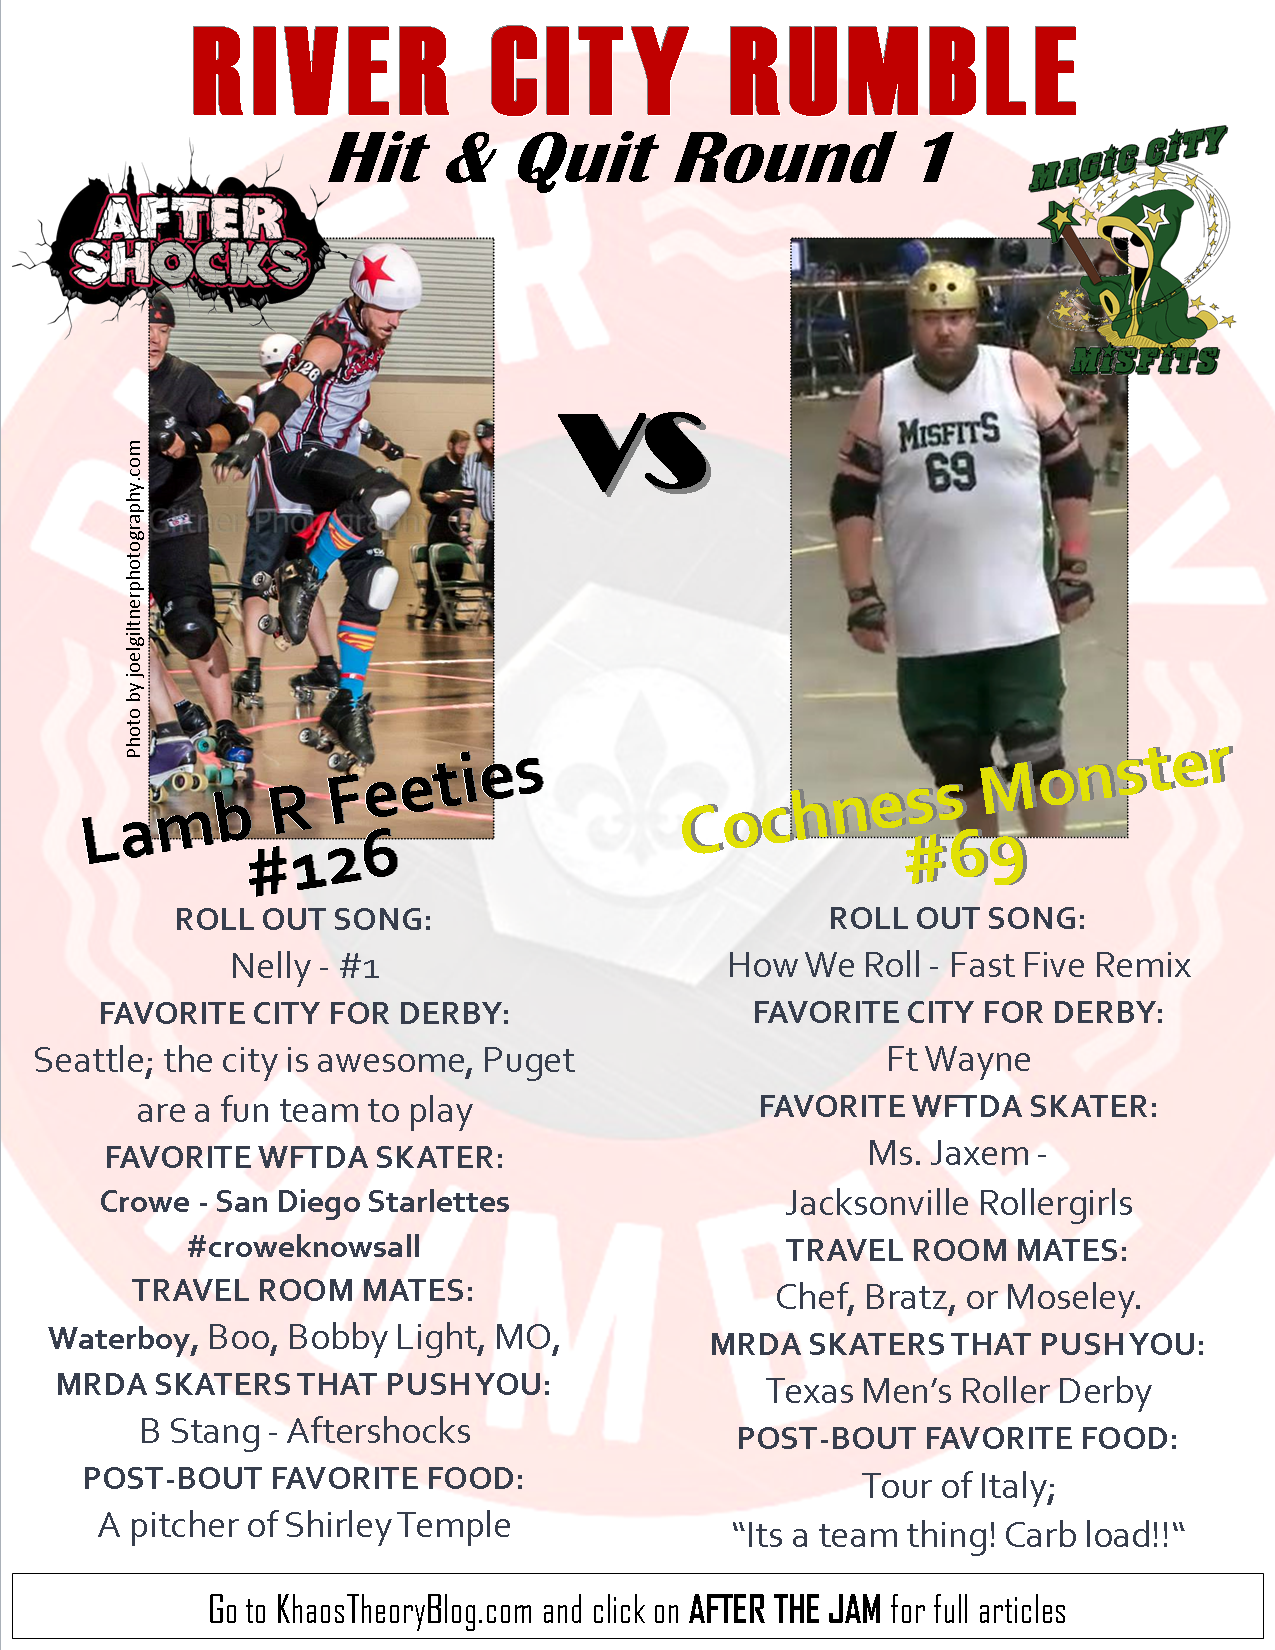
1) What pump up song plays in your head when you take the track? I like to listen to #1 by nelly hahahaha 2) What is your favorite city to travel to play derby in? Seattle, the city is awesome and the puget sound guys are a fun team to play against 3) Who is your favorite WFTDA skater and why? Crowe, she skates for the San Diego roller derby starlettes. One has tag says it all #croweknows hahaha the world will know about her soon enough. 4) When the team travels, which team mate(s) do you room with? I room with a couple of my favorites waterboy, boo, Bobby light and my bestie MO oweuone 5) Which MRDA skater pushes you to be better [because they’ve beaten you in the past]? B Stang for sure, I have skated with him and around him since we were young. He’s always been a step ahead of the rest. I work for him now and I use all that time with him to gain knowledge. In my opinion he’s the best skater in the world. 6) What is your favorite post-bout food? I always order a pitcher of shirley temple hahaha
1) What pump up song plays in your head when you take the track? How we roll (fast five soundtrack) 2) What is your favorite city to travel to play derby in? Ft Wayne. Just because we have been there so many times for spring roll I can drive around without gps. 3) Who is your favorite WFTDA skater and why? Ms. Jaxem [Erin Jackson of Jacksonville Rollergirls]. She grew up in my home rink and seeing her go from rink rat to world champion speed skater and arguably the best jammer in wftda is awesome! 4) When the team travels, which team mate(s) do you room with? I normally room with Chef, Bratz, or Moseley. 5) Which MRDA skater pushes you to be better [because they’ve beaten you in the past]? I wouldnt say a particular skater, but Texas men’s has really impressed me this season and shown what hard work and practice can do. 6) What is your favorite post-bout food? If it’s a tournament weekend, the Tour of Italy. It’s a team thing! Carb load!! 😀
The Aftershocks are generally an unknown in the MRDA.They played (and lost) to Puget earlier this season, but their roster has gradually increased with talent over the year. Magic City returns to Champs this year, and they are hungry to prove that they belong in the Top 5.
Taking on Denver. Photo by Joel Giltner
Both teams play with speed, and both teams prefer a face-to-face blocking game to rotating walls. The Aftershocks have world champions B Stang and Just Mike from Your Mom on their squad, and they bring high level experience to the squad.However, Streak has been ‘getting the band back together’ all year in Jacksonville, you can expect to see the unnecessary spins and extreme lateral coverage that has made MCM a fun team to watch.
East Coast versus West Coast happens on WFTDA.tv at 11am CST on October 17, 2015.
Bratz escapes a Gatekeeper pack. Photo by James Brady 2015
There’s been a “12 Reasons you should watch roller derby” buzzfeed article floating around. Guess what, folks? Some of it they got right! Some of it they got eeeehhhhh…..
So I’m rebooting this blog! It was one my first popular article on Examiner.I’ve re-written some of the explanations, but I’ve kept the headlines the same. 2010 derby or 2015 derby, these are still the 10 reasons you should watch roller derby. (PS Most derby leagues still don’t have seating, so you may want to pick up a Coleman Stadium Seat for your comfort at the game.)
The WOW factor How many of your friends watch roller derby? If the answer is “many”, then maybe there is something to this. Maybe they have an in on something. If your answer is “none”, you can introduce your circle to the fast-growing sport on the planet. How cool does that make you look? Roller derby is a completely unique, high-impact sport that is totally inclusive of age, gender, nationality, etc. It is an international phenomenon that grows every year. In 2018, the third Roller Derby World Cup took place in Manchester, England, hosting 38 countries, including the Czech Republic, Korea, and West Indies. Barcelona is the stage for the third Men’s Roller Derby World Cup in April 2018, where 24 teams, including Japan, Chile, and Denmark will compete. The speed, power, and finesse on 8 wheels is enough to keep you entertained, even if your local team isn’t allowed to sell beer!
Texas took on Missouri in the men’s championship of State Wars in December 2014, with hard hits and fast feet. Photo by Phantom Photographics.
The social works of derby teams Roller derby teams are often non-profit organizations themselves; regardless you will find your local teams out at charity events and raising money for good causes at their home bouts. Tens of thousands of dollars have been raised worldwide for charities. Whether promoting suicide prevention, helping wounded animals, collecting for homeless shelters, promoting love as love, or helping a city rebuild after tragedy, derby has covered the spectrum of charitable causes. The Girls on Track Foundation was founded to keep young girls involved in the sport of roller derby, thus building their confidence, courage, and leadership skills. Locally, our own Tampa Roller Derby is involved with Big Cat Rescue and Girls on the Run,
Athletic prowess These are athletes. Teams practice between two and six times a week, and the participants work out beyond their practice limits. Yoga, crossfit, powerlifting, Spartan Races, aerial silks… the cross-training of roller derby knows no limits.
Impressed by your favorite hockey player doing fancy footwork and scoring points? Wait until you see Lil Slinky of Stockholm duck and dance through the pack effortlessly. Get hyped up by your favorite safety playing all over the field defense? You will love seeing Alli Kat Scratch of the Tampa Tantrums crush the hopes and dreams of her opponents. The feats of agility and pure strength are display at any game (whether it’s the 500-person strong Rose City Rollers or 20 strong Twin City Terrors).
PHDiesel makes a lap for Team Florida at State Wars. Photo by Phantom Photographics.
“Any Given Sunday” Just like in any other mainstream sport, roller derby has the “any given Sunday” mantra. The Oly Rollers came out of nowhere in their first season as a WFTDA* team, and took the Hydra as the underdog. It is possible for any team to sweat and bleed their way to beating a giant of roller derby. Tournament play has seen a lot of international teams come in and shock the world with their undeniable strength. Teams from the United Kingdom, Germany, and Australia have been doing damage in WFTDA and MRDA** rankings the past few years.
Less expensive than a movie date
An American movie date can easily breach $75 (IMAX anyone?), and if you’re counting dinner, you can bet on a night breaking $100. Yes, there are some games that offer beer or full entrees (thank you Charm City). Yes, buying merch from Tampa’s Wrecking Mall might up your final cost for the night. However, most teams still play in roller rinks with small concessions and bake sales. A derby date can easily stay under $30! Derby encourages interaction and conversation, whether you are with one person or a group, and it’s way better than sitting awkwardly in a dark theatre with your Tinder date. Bring them to derby!
Who needs a movie when you can be next to the action? Photo by Phantom Photographics
Community! The roller derby community is a very inclusive place; if it’s a tailgate kind of game (you can check with the league on their event page ahead of time), get a group together and hang out in the parking lot. My first team was notorious for cookouts and beer trading in the parking lot of the Olympic Skating Center before games. Groups often mix and mingle. Don’t know what’s going on during the game? Ask the people beside you (or look for someone with a “Ask me about derby” sign). Regardless of the side you are rooting for, everyone is super friendly and inclusive. You will make friends in the fans, the refs, and the league members themselves. Labels and judgement have no place in our house, so come one, come all!
Direct interaction with athletes
How many sports teams offer one-on-one time with their athletes? Every game and after party is a meet and greet, and leagues host events throughout the year where you can meet your favorite skaters. You can catch up with league scores from those directly involved, and can really feel like a part of the organization even as a fan. Websites like Flat Track Stats even gives you chance to follow how your favorite travel teams are doing, even if the team hasn’t received official sanctioning ranking. With the popularity of tournaments growing in roller derby, keep your eyes peeled to your team’s social media, it’s likely their travel games will be live streamed at some point. Then you can even watch them from home.
Junior derby is gaining momentum! Your son or daughter can play, or you can watch the future of derby at local events. Photo by Phantom Photographics.
Unique characters Mainstream sports are chuck full of big characters, and roller derby does not disappoint. Be warned: It is not make-up and fishnets. It is the heart, soul, blood and tears that they pour into their work that make these athletes into giants and idols. Big characters in derby are the big hits, the big jams, and acrobats on skates. Whether your team matches in black compression pants, or dons old school mis-matched DerbySkinz and stickers on helmets, you will see the personalities on and off skates. It’s not just the skaters that make the game exciting: The announcers of roller derby are some of the most colorful characters you can imagine. Plus they are super knowledgeable about the game, so make friends with them.
You might find a new love Skaters, refs, NSOs***, announcers, medics, and coaches have to come from somewhere. Often, they come from the audience. Fans, friends of the fans, and the munchkins of fans are the future of roller derby. Even if you never end up skating, your support is vital to your league. Being a fan and posting about the games, inviting your friends to the events, watching WFTDA.tv, watching the YouTube archives of bouts… it spreads the goodwill of derby to people outside of the community who may never have heard of derby before. Or, maybe they went to a game three years ago and “have been meaning to return”. Maybe you can be the one to remind them to spend a Saturday night at the rink.
Derby is always looking for more officials to help at games. Skates not required! Photo by Phantom Photographics.
It’s just plain FUN The excitement is infectious. Regardless of your familiarity with the sport, the skill and strength of roller derby pulls you in. It is impossible to resist cheering as your jammer breaks through the pack. Try not to flinch when your team knocks an apex jump out of the air. The more you learn about your league, the more fun you will have each game. BUT the only way to learn more is to actually go!
Calling it off! Photo by Phantom Photographics.
If you have been pushing off attending a roller derby bout, it’s time to get off of Facebook and head to the rink. Friends, excitement, and real social networks await you. Youtube offers some great fan tutorials, or wait until you get there and inquirein person. Spend some time at your local games. You’ll be cheering more than at a Marvel movie, you’ll get closer to the action than nosebleed seats at Lincoln Financial, and you will build relationships unlike anything else you have experienced before.
*Women’s Flat Track Derby Association
**Men’s Roller Derby Association
***Non-Skating Official
Support Khaos Theory by making a donation to the blog today:
Thunder City Derby Sirens Photo by Phantom Photographics
What makes us want to be on a roller derby team?
I’ve been thinking about this topic for months. Tried writing a blog a few weeks ago and I couldn’t actually translate my feels into a coherent written structure. I’m not talking, “Why do we love the sport?” or “Why do we join a league?” But rather, what drives us all to make a travel team? Or be drafted to a home team?
Before my home league’s travel team votes on the charter, each skater gets to talk about what they had to offer, and why they wanted to be a part of the team. It was interesting to hear the answers from those dropping their name in the hat for the all-stars versus the b team. There was quite the difference in theme of statement from one team to the other. I realized that those going for the the all-stars had a much different theme of answer than those wanting to be on our b-team. It got me thinking more and more about WHY we want to play on teams so badly.
If you ask a derby skater why they want to be on a team, the most common answer you’ll probably get is: “I want to play in bouts!” (Or do I call them games in the blog now?) **winky face**
They want to travel. They want to play other opponents. They want to prove themselves. Playing in bouts is a bit about the attention of everyone watching you, but should also be about the practical applications of skills and drills. Bouts are the place we test ourselves against an opponent to see if we have improved. I have been on many teams at this point, and I can say that being in a bout means different things based on the culture your team builds.
Tampa Roller Derby on our way to Texas for a weekend of the derbs.
Some teams value bouts strictly as ranking potential.
Some teams just want to enjoy the fun of the sport; including all that boutfitting, production shenanigans, and after parties offer up as they play against your family from a different city.
Some teams want to try out what they have been drilling in practice, to see how their strength and mobility have improved.
Some teams play bouts just to raise money in their home venue and have their friends and family come and watch them do the thing that they love.
Some teams work really well together on bout day, and everything is low stress and fun.
Some teams may work together, but tension runs so high that benches become explosive.
Maybe a team just has that one player that yells at refs or complains about calls, and because they’re a “superstar”, the behavior isn’t squashed. That behavior spreads to the rest of the team, and the bench becomes a 3 headed monster.
Maybe the bench coach is that one superstar yelling.
Or maybe everyone loves each other and the sport so much that everyone is just focused on the fun of the game.
I should mention that teams don’t always take the time to create a culture. Some are self-aware enough to create a mission statement of culture to promote and strive for. Most derby teams, I have seen, do not even understand that a culture has manifested through coaching habits, attendance enforcement, and superstar treatments. Sometimes an awesome derby culture of fun and support is born organically through individuals gathering for a common purpose. Too often, I have seen leagues succumb to the expectation that certain players get praise and playtime, and those players can do and say no wrong. Everyone else are plebeians and must fall in line and teach themselves.
If you just had an ‘ah-ha’ moment, recognizing that your team has not given itself a Culture Goal (or worse, you’re in one of those cancerous league situations!), maybe it’s time to sit with your steering committee and decide on some core values for the league and individual teams.
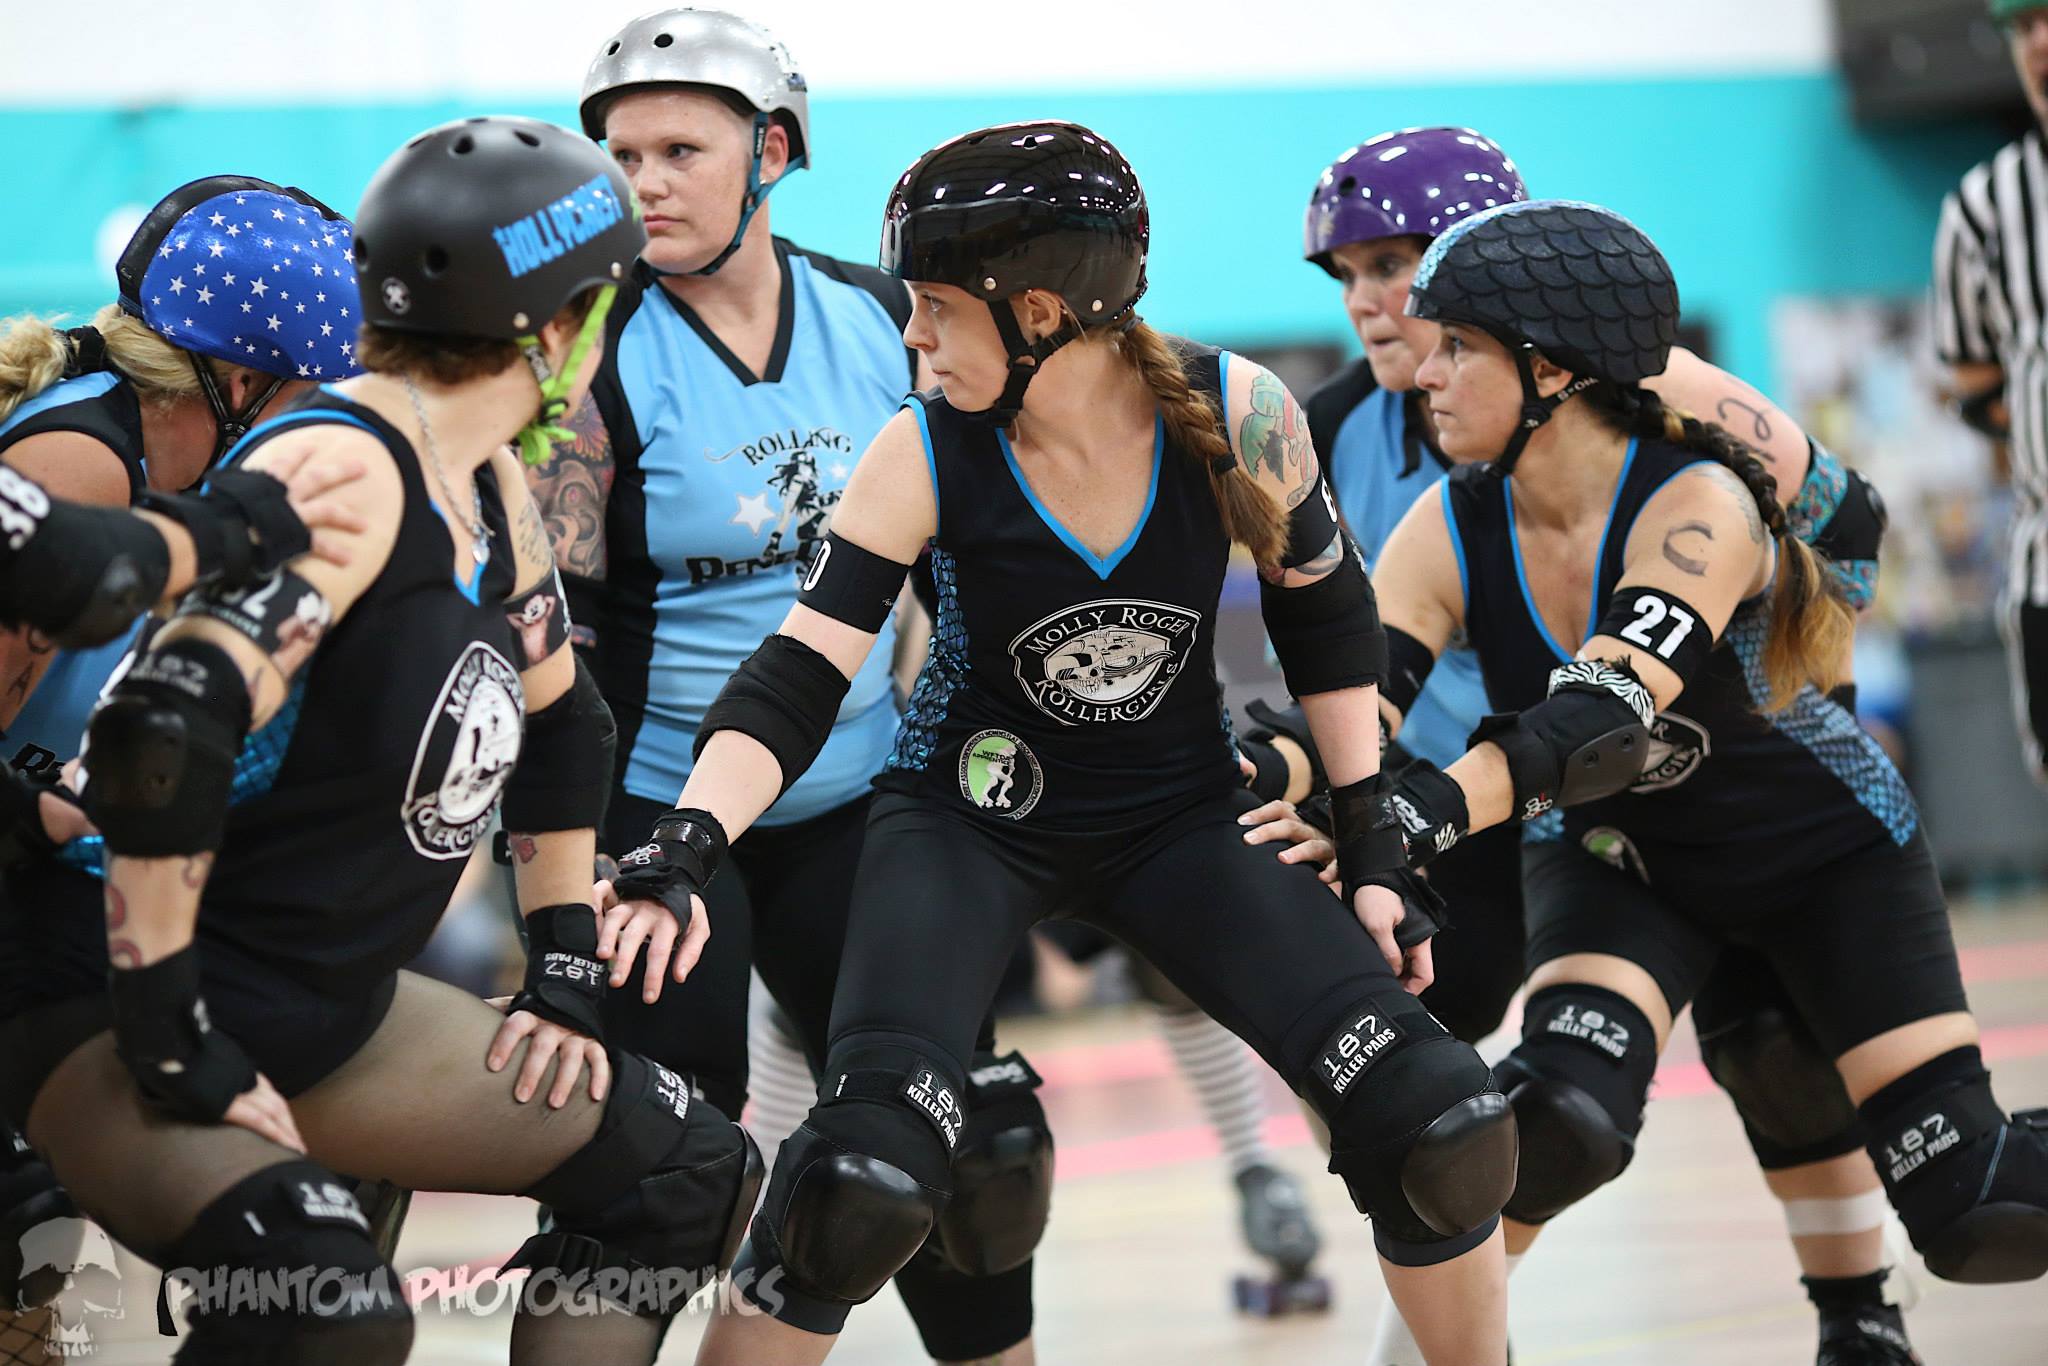
Molly Rogers line up against the Rolling Renegades of Sarasota. Photo by Phantom Photographics
Many cultures have this idea rooted into their core values without realizing it: “You will play bouts when you are on the travel team, and we do this to play in bouts.” So the skater immediately begins lobbying for a spot on the travel team, despite dedication. Despite training. Despite safety. Despite their willingness to play on a team. Endgame, we are taught, is: PLAY IN BOUTS.
I have a radical suggestion for you, Roller Derby:
You should not want to be on a team to play bouts. You should want to be on a team to practice roller derby.
Wait, what?
You should want to be on a team to PRACTICE roller derby.
What do I mean?
I mean we need to adjust our mindset.
Bouts are fun, yes. Bouts are what count towards our ranking, absolutely. Bouts are the culmination of our practice time and work together, yes. But it’s just 60 minutes on the clock.
I am not saying we should undervalue bouts, or want to play in them less. Rather, I think we all need to shift focus to being excited for practice time. Most of Roller Derby practices at least twice a week. You are spending far more time with your team in drill, skill, and endurance situations than you are in bout situations.
I do my best to not even worry when my next bout is, because my intensity does not change from practice to practice. I do not show up with different intentions or drive when I know a roster is being decided that night. Every practice is 110%. I pay for this time on the track, so I am going to love it and use it. If I am put on a roster, great! If I’m not, it’s OK because I have practice again Sunday night. I know I won’t be short on derby for the weekend.
Too often skaters put so high a priority on bout day that all they think about is making the roster. They show up just in time, and with just enough intensity to play in the bout. If we could shift the prevailing thought in roller derby to be less “BOUT DAY!!!” and more “PRACTICE DAY!!” think of how many people would value their drill time more? How much would attendance change?
Bout day is a priority because Roller Derby puts an emphasis on it.
To me it is just as fun and invigorating to stop Tazmaniac in a wall drill in practice, as it is to stop her in a bout day situation. Putting our focus on the awesome of practice means more excitement, which means more bodies, which means more opportunities for strategy and teamwork. Which will, unsurprisingly, lead to MORE SUCCESS ON BOUT DAY.
Slayor Moon Rojo Grande, Pup, and Splatypus ready for the Molly Rogers jammer. Photo by Phantom Photographics
When practice time is the center of attention, you can focus on goals as an individual and as a team mate. You can put your energy into what is being practiced instead of worrying about making the next roster.
When your focus is practice, not bout day, you think about your daily cross training differently, and with the mind of making practice better. You know you’re going to be doing five minute jams at practice on Monday, so what can you do on your off day, Saturday, to improve your conditioning for it? Thinking about that every week builds into months and then years of cross training, almost by accident!
When you focus on practice, you get to struggle and laugh with all of your team mates in all the different situations. You get to love the sport and the nuance of the sport.
When our focus is bout day, we get caught up in the spotlight of it. We get caught up in the pressure of performance, but when we focus on practice day, we are all Superstars, and egos are left at the door because no one is watching. When our focus is practice, we work hard for two hours at a time. If we can work hard for two hours, we can definitely work hard for our piece of 60 minutes.
Practice is the proving ground for bout day.
Practice is where we get to push ourselves and learn.
Practice is where we get to high five our family and celebrate victories.
Practice is where we get to tell our friends that bad days happen, and that one bad practice will not equate to a lifetime of failure in the sport.
Practice is where we get to put our head down and do work.
If your heart doesn’t beat with excitement when prepping for training (sometimes up to 5 in a week), why are you in the sport?
Glory should come from within. Achievement should be felt when doing something awesome with your team mates. This is no longer an individual sport. No longer should we put the spotlight on those who have talent, who don’t come to practice or fundraisers or do committee work.The spotlight should be on the weekly warriors who sweat with each other and create the bonds that only practice time can.
Practice IS our sport. I feel like the leagues that recognize and promote that in their culture, have the most success over the long term.
Stop counting down to bout day. Start counting down to Monday.
For coaching and nutrition help for all athletes, or to ask questions, propose blog ideas, or just give feedback, leave me a comment, or drop me a line at DerbyAmerica@gmail.com. I’m always booking league coaching for all levels.
Don’t forget to visit Phantom Photographics’ Facebook to purchase photos and ask him about his cool shirts.
Like my EAT BIG PLAY BIG notes, this is not going to be a verbatim dissertation of what we went over, but more the bullet points of things we talked about and maybe some WHYs involved. We talked about nutrition too, but because I have my notes posted from EBPB up and running, why don’t you just check them out and get the full picture of the athletic nutrition.
WHAT I MEAN BY LIFTING WEIGHTS
Big lifts – Build all over strength and power, utilizes the full bar
Barbells – Build stabilization muscles and helps support big lifts, small movements, and quick twitch.
Free Weights – Barbells and bars; your body must do the work to keep things in place
Plate/Smith Machine – Training wheels; no real accurate measure of weight. Some plate machines are useful (like the leg extension) but usually you can pass by these.
Cable Machines – The baby of free weights and plate-loaded; there is some stabilization work done here.
Free weights and cables should be used as your supplemental workouts. Like your vitamin and protein supplements, they are the extra stuff you do to support the mainline of work. They should not be your primary form of ‘weight lifting’. Mostly because you’re not really lifting weights when you do them.
WHY SHOULD YOU WEIGHT LIFT?
The easy answer is: Because you play a contact sport.
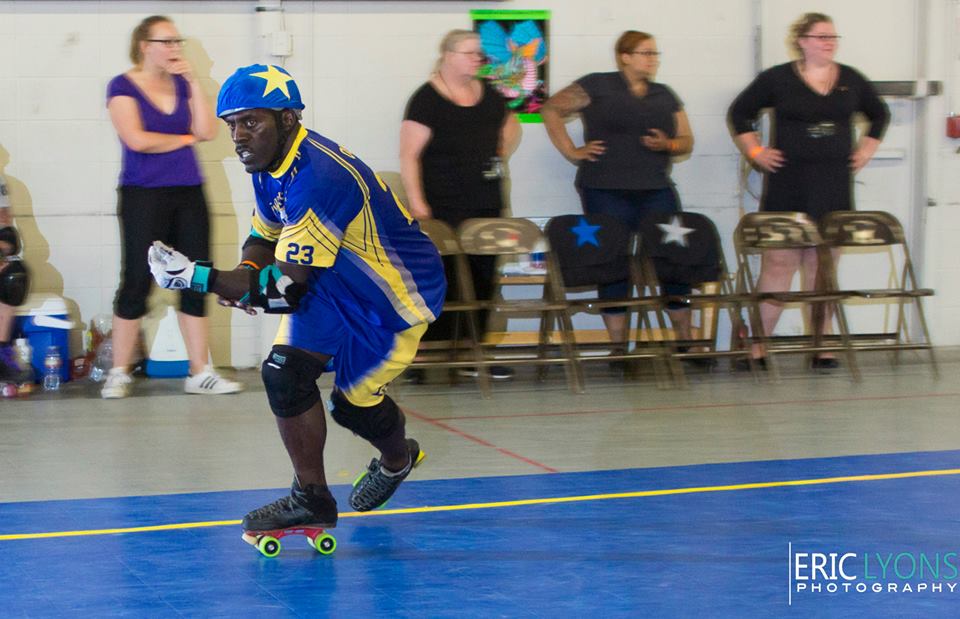
Gnat King Kill getting it done. Strength effects speed and control. It allows him to deal with fast skaters and bigger blockers.
Show me one contact sport that does not require their athletes to weight lift. If your coach tells you to do dry land drills, do you question? No. You question weight lifting because it’s different and new and super difficult. The resistance to lifting in roller derby is not because it’s not helpful or proven to advance skaters – it’s because it takes more effort to do it. And, honestly, it can be intimidating.
From the physics standpoint think of this reason why you should weight lift:
If you can only squat 130 pounds, that means you can only push that much weight (approximately) into your wheels. If you have someone who is 170 pounds hitting you, but you can only respond with 130 pounds – who is going to win?
This is a very basic, crude example, but hopefully you get the point.
Why bench press? I learned during Beat Me Halfway that if you have Magnum PIMP doing truck-and-trailer with you, your arms and core better be able to hold up to the resistance he’s giving you. If he then directs you into a full-speed Screecharound, your arms and body have to be able to deal with as much power as he’s putting into you to transfer to your skates, to transfer to Screecharound to take him all the way to the line.
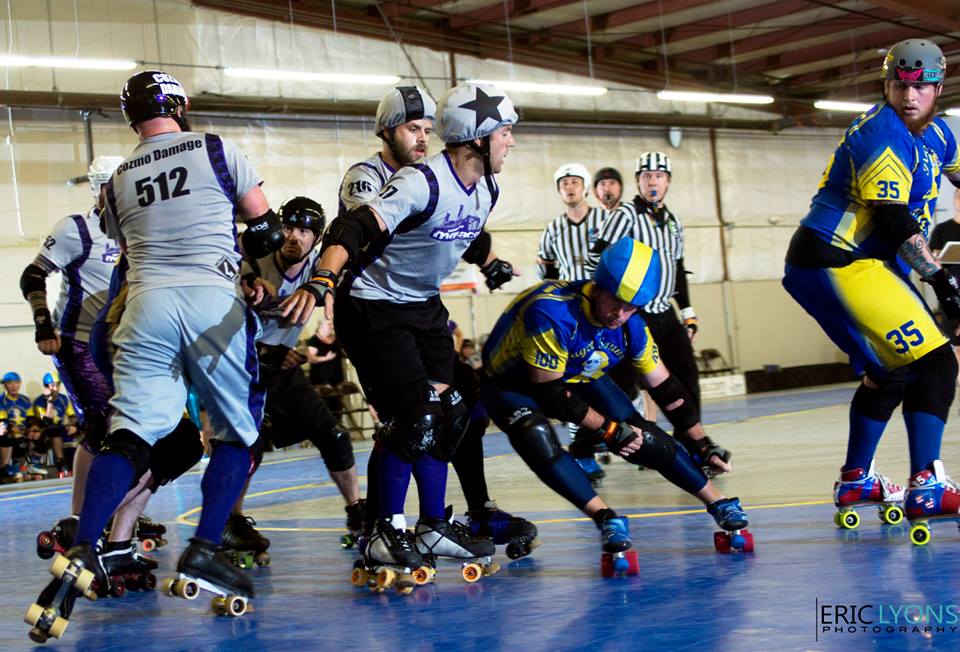
Arm strength has just as much a place in derby as leg strength these days, as illustrated by the Mass Maelstrom blockers. Photo by Tyler Shaw – Prints Charming Derby Photography
PHYSICS!
(and also, I was so sore the next day)
If you can push a sled with 150 pounds on it, you can push through a link giving you 100 pounds of resistance.
WHAT IS CONDITIONING?
We talked a lot about lift days verse conditioning days.
Your lift days are just that. You’re picking up heavy weight. Your conditioning days involve cardio work, particularly HIIT. This is your tire flips, your hill runs, your wind sprints, your heavy plyometrics. If you do Crossfit, those WoDs should be your conditioning days … so the extra days. WoDs every day will not build your strength the way lift days will.
Myself and McJagged picked up heavy things and moved them around, jumped on walls, and moved around kettlebells for conditioning work
WHAT DOES THIS FEEL LIKE?
Like with derby, we have to adjust to a new feeling when we start weightlifting. If you’ve done plate machines in the past, then you are not used to what it feels like to have 180# on your back, or to pick up 200#.
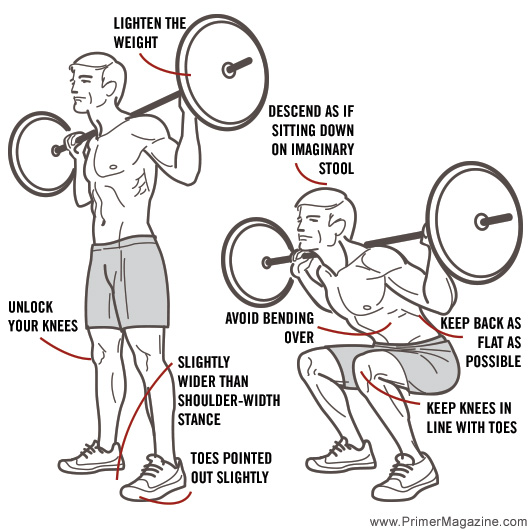
It feels heavy. It feels miserable sometimes. It feels like you might hurt yourself. Just like it feels when you’re doing a new advanced skill on roller skates. Like those one foot “chomps” or one foot plows.. Picking your foot up and putting it down in front of you, with your toes turned in and your knees touching? That’s terrifying! I was sure I was going to break my leg. I didn’t. And you won’t break your shit just because it feels heavy.
It’s supposed to feel heavy. That’s the point.
DO I NEED SPECIAL GEAR?
Not necessarily.
I wear knee wraps because I can feel things shift around in my right knee when I squat and it’s weird and I don’t like it. With lighter weight, you don’t need belts, wraps, wrist grips. As you start lifting, talk to people around you about the gear they have. You’ll learn when you’ll need to get a belt, or if you want to get gloves.
Wear flat shoes or no shoes. Those weird toe shoes? They actually work really well for lifting. So do Chuck Taylors. So does nothing. Just like you wouldn’t buy Bonts for your first pair of skates, you shouldn’t go buy the special fit lifting shoes before you start lifting.
WHAT ARE THE LIFTS I SHOULD DO?
No questions asked you need to do:
Squat
Deadlift
Bench Press
Lifts that I think you should incorporate:
T-bar Row
Front Squat
Hack Squat
Incline Bench
Sumo Deadlifts (or Sumo/Russian)
Upright Row
Overhead Press
WHAT SUPPLEMENTAL LIFTS SHOULD I DO?
This one is tough. It depends on your programming. Ones that I make sure I incorporate:
Leg Extension
Glut-Ham Raise
Pull-Up
Hanging Leg Raise
Bent Over Row
Lat Pull Down
Seated Row
WAIT – HOW DO I KNOW WHAT TO DO?
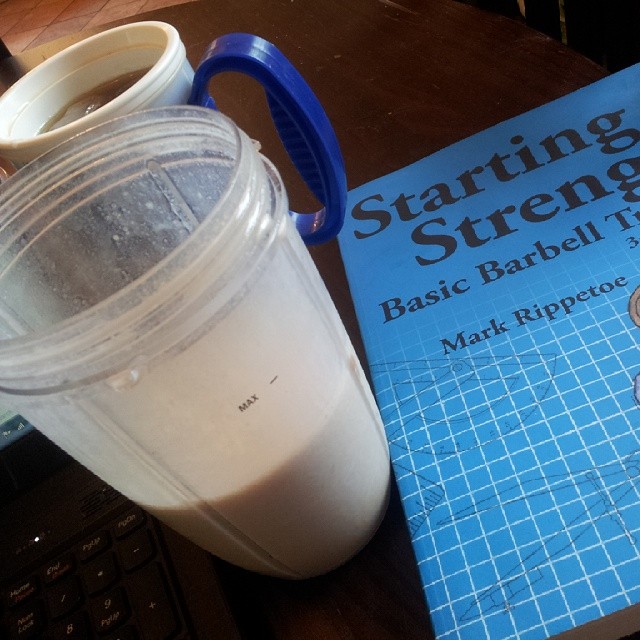
Guess what? More reading for you!! What I recommend to EVERYONE is to pick up Mark Rippietoe’s “STARTING STRENGTH”. There is an app you can download called 5x5Stronglifts that will help you through the whole process.
Here’s the idea that I can pass on to you that I started with… 5×5. So you’re doing 3 lifts each day, 5 times, 5 reps. This does not include your 5 rep warm-up. When my plan was set for me, we did one lift for the upper body, one for the back, one for the legs.
I then did 1 or 2 supplemental lists each day (unless I was crazy spent). Getting someone to help you set up a training plan around your skating schedule is awesome. I had a couple people helping me along the way. And don’t be afraid to tweak your schedule as you progress. After your first four weeks, you should be in a routine, but before that it’s ok to move things around and figure out what works best for you!
Learn form on your own through the BUFF DUDES series. They’re really a great, short series of tutorials.
HOW DO I KNOW HOW MUCH TO LIFT?
Again, having a friend that knows lifting is helpful here. If you don’t, go to your gym and find the biggest dude or lady who is both strong in the upper and lower body (or ask someone at the desk of who to ask), and humbly request help.
Think of it this way: If someone came up to you at an open skate and said, “Hey you look like you know what you’re doing. I’m trying to get into roller derby, but I don’t know how to plow stop, can you watch me real quick to help me?” You’re not going to tell them to fuck off. Lifters feel the same way about their sport. I promise they’ll be nice to you.
Step one is to find your personal record (PR), also known as your one rep max (1RM).
Do not plan on doing your 5×5 during max days. You also shouldn’t try to max out multiple workouts for the same body part. For example, don’t try to max out back squat and front squat on the same day.
To max out, do your warm up weight (people can help you figure out what that would be… for me, my deadlift warm up has ALWAYS been 135#, and my squat started at 100#, bench was 45# … these are good starting points). Do 5 reps. Your buddy can help you go up in weight. Do 3 reps. Then up in weight and do 1 rep until you can’t move it. Boom. 1RM.
Plugging these maxes into your 5×5 Stronglift app will create a nice little “oh this is what I lift today” guide for you. You can contact me if you want something more specific.
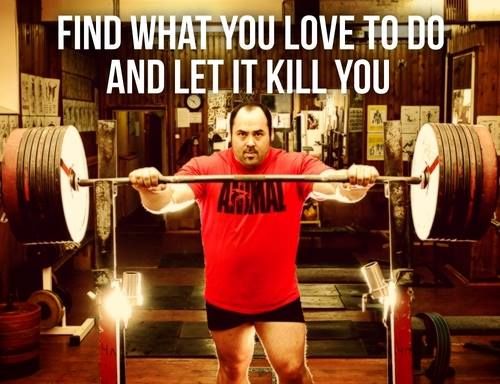
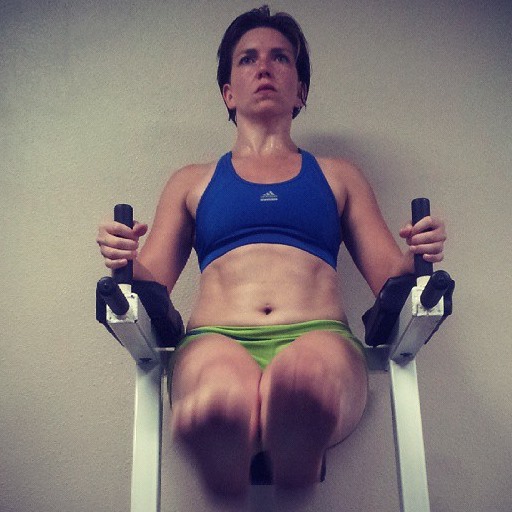
You call it extreme, I call it “what it feels like 185# on my back”
SO I JUST LIFT FOREVER NOW?
Things can change up, but yes, now you just lift. In a 5×5 program, I do like incorporating a deload week either on week 5 or 6. A deload week is when you do your lifts, but at 50% of your max. It gives your body a chance to recoup.
When I first started this program, I was going up in weight for some of my lifts each week, not up for others. The stronglift app helps you with that.
Setting goals will help keep you focused and your training tight so that way you don’t get bored.
OTHER NOTES
You will plateau. You will have bad days at the bar. It happens. Just like derby. Sometimes you have enough sleep, you’re hydrated, you’ve eaten enough, and you just can’t squat the bar the way you did the week before. It’s ok. It happens. Seriously.
This can be new and can be scary. Just like derby. Don’t be put off from lifting by yourself because “You don’t want to hurt yourself”. There is just as much risk for injury in this sport as others. If you play derby, you know that you can have someone there with you, you can be in the process of being coached, and you can do one thing and still hurt yourself. Don’t fear injury for the sake of fearing injury.
You are probably not going parallel on your squats. If you have never squatted before, start with BOX SQUATS. Your new gym bro can find a good box for you. It should be low enough that when you sit on it, your legs create an angle lower than 90 degrees.
Your back is going to hurt. That’s because this will be the first time you’re fully using your back for a lift. All the time I hear “Oh man, my low back hurts! I must not be deadlifting right.” Or you’re deadlifting exactly right and you’re using muscles you never have before. Your back is going to hurt.
If your back is weak, your squats will suffer. “What?? But squats are a leg lift!” Yes, but the bar is on your back. So if you can’t support the bar, you can’t squat it. It’s possible that your squats may be lighter than what your legs can handle at first, because your back is not strong enough.
RECORD YOURSELF SO YOU CAN SELF-CRITIQUE AND GET NOTES FROM FRIENDS. It seems super narcissistic, but you can correct between sets sometimes! You can send the video to your friends from around the country and say “Hey is this parallel?” or “what am I doing wrong?”
When you’re lifting, EYES UP HIGH! Pick a spot towards the ceiling, look at it. Do not look side to side. Keep your weight on your heels, you should be able to wiggle your toes.
I think that’s about it!
Drop me a line if you want some extra help or have other questions about setting up your program. Your offseason program is going to be different than your in-season program, so I can help you with that stuff too. When in doubt, read books! 531, Beyond 531, and Starting Strength are the ones that have been recommended to me. Drop me a message at DerbyAmerica@gmail.com with questions or if you have anything you want me to address.
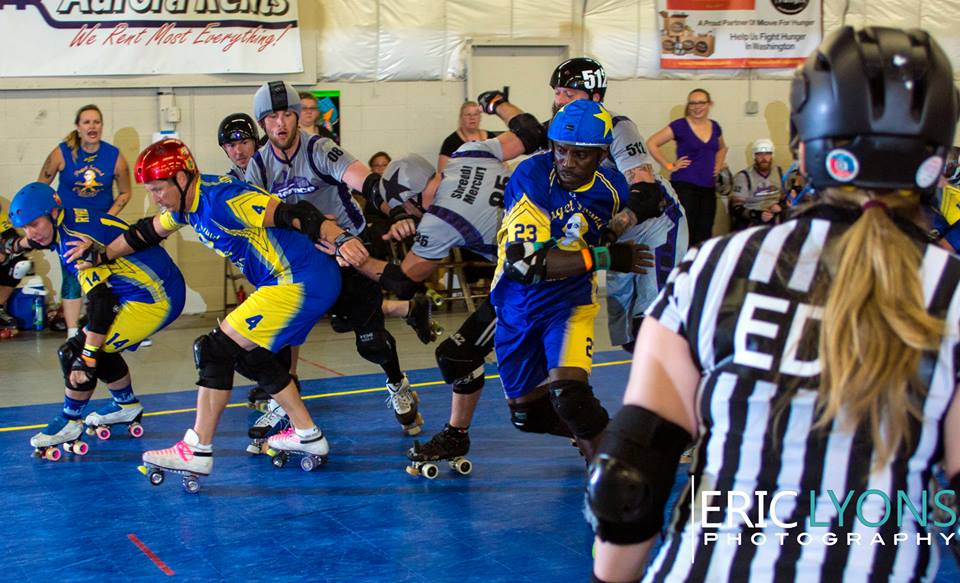
You cannot ignore Puget Sound Outcast Derby. Mostly because their uniforms demand your attention, but also because that jersey is probably going by you at Mock 5.
The Outcasts are a team of World Class level roller sport athletes that have come together for the love of derby. Ball and cane, speed skating, hockey, artistic, aggressive inline, downhill racing – these are all the sports (and I may have missed some) that the men of Puget Sound have competed in. When you watch them play, you can’t help but notice their sheer skating talent and balance; they do not fall. They are hard to push out of bounds. They are hard to out skate.
The longest-establish West Coast men’s derby team, Puget Sound is no stranger to the Championship tournament. They have qualified for Champs each year (and even finished #2 in 2011 against New York Shock Exchange), and plan on making a rise above their #4 seeding by the end of this weekend. As host of the tournament, Puget Sound seems to be trembling with excitement to show the world that they have been focusing on their weaknesses and developing game plans for each opponent they face.
In the past, Puget has seemed to rely on their straight-up talent to win their bouts. They are so much fun to watch, but when I have seen them play (Mohawk Valley Cup in 2013 and then streaming at Champs), I have noticed a ‘superstar’ style of play. They have relied less on walls and tightly-bound defense, and more on big, driving hits, pulling cut tracks, quick bursts of speed, and out-skating the opposition in the past. To continue to dominate, Puget knows they must shift into a team-based style of play.
Scott Slamilton’s artistic background make him nearly impossible to capture. Blockers like Bonus Jonas and Dilly Dally are small and unassuming to look at, but their agility on wheels only enhances their ability to pop into larger opponents to stop or redirect an opponent’s momentum. (small blockers – watch these two this weekend. Take notes. Learn things.) With such a variety of sizes on the bench, Puget can really tailor their lines to take on individual jammers to play to strengths. Need pure power and size? Put out Big Bill and Radiallac. Need stronger walls and communication? Put out Quadzilla, Low Rider, and Thunderstruck. If you need blockers who can chase and re-capture a wiley jammer, you put out Cory Pain and Chuck Hendrick.
In the first round of play this weekend, Puget Sound gets to face their little brother, Bridgetown Menace. Bridgetown has been steadily closing the point gap between PSOD and themselves each time they play. Puget needs to focus on communication and containment against Menace if they want to continue their winning streak. Both teams are very fast and very sharp, neither waste energy in their hits or skating. No more can Puget rely on being a team of simply more talented skaters. Menace is coming in with a point to prove, and Puget Sound has an opportunity to show that they have learned from their past match-ups. Puget has a chance to finally solidify being a collective team of insanely talented skaters that know how to read each other and trust each other. Puget has a chance to show the world that they are here not just to play. They have a chance, and a desire to walk away as the host of the Championship tournament where they will leave with more gold around their neck than just what is on their uniform.
Check out Puget Sound’s Facebook for updates and awesomeness. Thank you, Eric Lyons for use of ALL the photos in the article. Tune into WFTDA.tv at 3p PST to watch Puget Sound work their fancy feet magic against Bridgetown Menace.
I got to revisit this class at BEAT ME HALFWAY in 2014, so I’ve gone through the original notes and added in some stuff we did at BMH, but kept in the stuff we did at RC 2014. 😀 Anything BOLD is new content. There’s not too much.
I used to be a big fish in a small pond. I thought I was advanced because of how many points I would rack up during games, because of my jammer differential, because of my lead jam percentage, because I could own opposing players with my team. Then I transferred to a Top 20 team and, though I knew I was in for a humbling, I didn’t realize how humbling it would be.
It was awesome.
I have improved so much in the last year through changing my training program up and skating with Charm City Roller Girls (and now Tampa Roller Derby and Tampa Bay Men’s Roller Derby!). I designed this class to pass along the things I’ve done in the last year to take me from true Intermediate to a low-to-mid Advanced roller derby player.
Each skater approaches the lane on their wheels and must quickly transition to the toe stops, side step (preferably with the grapevine step) through the cones, and then burst out of the cones back onto wheels. When sidestepping, skaters should be facing the interior of the track.
If you have many skaters, make lines before each set of cones and have skaters rotate between inside and outside line as they go through. Skaters should challenge themselves to be as close to the line as possible. Think about where you are looking (not at the ground!), how straight are your legs (knees need to be bent a bit), and how easily you can drop your toe stops (they may need to be lowered).
AMENDMENT: If running on your toe stops is super easy, try different ways of running the line – forward, side shuffle, side-step crossover, and also BACKWARDS through the cones! Try all the new things!
How to set up the toe stop run cones
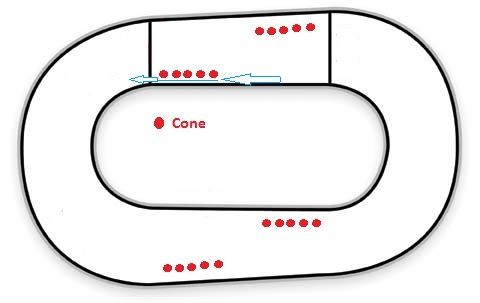
BACKWARDS LATERALS
Using the cone pattern shown below, skaters have to move backwards to each cone. THEY SHOULD NOT SHUFFLE STEP, they should use backwards crossovers to get from cone to cone.
At each cone, skaters should use a one foot plow stop to stop COMPLETELY before moving on to the next cone.
Focuses: Stopping as CLOSE to the cone as possible, getting from cone to cone as QUICKLY as possible, and spotting the cone then looking forwards again. We want to work using periphery and not relying on having to stare at an object to get there.
If skaters have trouble with backwards crossovers, have them create small Cs with their feet to get them going. If skaters have trouble starting the lateral, wiggling the butt is a great way to get started. You can also do a pivot on the front wheels to start the motion.
Pattern of movement for backwards laterals
EDGING AT THE LINE
Every skater will need a straight line of clearance on the track. For 30 second intervals (at first, you can bump it up for more advanced skaters), skaters will push off from one side of the track. The goal is to get from one line to the other in one push, and use their edges to stop as close to the line as possible. A video will explain this better, but here’s the procedure:
Standing at the outside line
Inside foot points towards your destination. Outside foot pushes off of the outside edge of your skates to get momentum. All weight on the inside foot.
Put the back foot down on the floor, pointed at the spot you pushed off from, and transition your weight onto that back foot.
At the inside line, ‘stomp’ your foot (push into your edges) in order to stop your momentum
Remember to keep your center of gravity low, but you probably won’t be able to do this in SUPER low derby stance.
Do intervals of these. I like to do at least 3 30 seconds worth of practice. This will lead into the next drill.
STEPPING IN FRONT AS A WALL
We’re deviating from the flow of the class at this point, but I don’t care, it makes the most sense to explain this after the edge to edge work.
In groups of four, have everyone number off. This is their number for the whole drill. The groups will skate around the track in a four wall (hopefully winging out in the corners, and practicing all other good fundamentals of wall work as they do so).
The person controlling the drill will stand in the middle and call out numbers at random intervals. When the number is called, that person “has the jammer”. Their job is to tell their team mates. Their team mates job is to step in front of that person as quickly as possible while maintaining their wall. The person who was called IS NOT DROPPING BACKWARDS – EVERYONE IS COMNG FORWARD. The person who’s number was called should do some lateral motion for a three count, and then re-enter the wall quickly and efficiently. The person calling the numbers should do so every 7 or 8 seconds at the beginning and then you can get faster as the drill progresses.
A NOTE: I have not done this drill yet where there is at least one person/group that does not understand the “Count to three and then get back in the wall” concept. There is always a person who will hang out behind the wall and look at you confused (and sometimes angry) when another number is called and they’re not in the wall. If you figure out a way to eradicate this, please send me an e-mail.
HIPS IN FRONT
Back to solo stuff! This is something I go over in the video. You want to pair up and have partners (first at a standstill, then rolling) work on moving their hips in front of an opponent. The skaters should be hip to hip, and then one person at a time will work on stepping just in front of the other person and moving their hips to establish position. There’s a big of a hip swaggle that happens. You have to get a little sexy with your partner.
CREATING SPACE TO KNOCK A JAMMER OUT
Jammers are really good at leaning on our backs and making it impossible for a goon defensive skater to come out of the wall, and knock that jammer out of bounds. Often times, there’s just no room for us to get our shoulder or hip in front of the jammer to walk her out of bounds. So, we need to know how to create space between ourselves (the wall) and the jammer who is leaning on a seam to get through.
These are not supposed to make HUGE impacts. When you’re practicing these, if it feels like the opponent isn’t going very far, it is ok! You’re just trying to create a breadth of air. These may not be used all the time, but you want to be able to know how to use them.
CAN OPENER (Johnny Crash, any number of other names)
In pairs, have one skater leaning on the back (legally, no back blocks!) of the other skater. The skater in front will practice throwing her shoulder backwards to pop the opponent off of her shoulder.
BOOTY POP (Twerk, and any other silly name you want to give it)
Same set up to practice as the can opener, this time, instead of using the shoulder, you are going to pop your hips backwards into your opponent to create space.
A NOTE: For both of these, you must have proper derby form. That is to say, strong back, tailbone tucked. If your ass is exceptionally extended behind you, you will have no booty to pop. You will have no contact with the jammer before you throw the can opener.
TAKE IT UP A NOTCH: Next time you practice walking a jammer out of bounds with a wall in front, have your skaters practice these techniques to create space. When I am blocking, if I can’t get my shoulder in front of a jammer, I will yell to my wall, “Pop her!” and they know to throw a shoulder or hip to make room for me.
BREAKING WALLS
JACK HAMMER SHOULDERS
Just like you can use your shoulders to attack people while blocking backwards, you can attack a wall with ‘jack hammer shoulders’. In groups of 3, have one blocker press up against the seam created by the two wall. (S)he should use her shoulders [independently] to hit the legal pieces of the opponents to create some space and hop thru the hole. Bonnie Thunders does this ALL THE TIME.
ASS IN THE GAP
This is something that not everyone will do well, or should do at all. This is another tool for the tool belt. You will have your two wall (like above), and the jammer will get a little bit of speed (the two wall should be rolling), and right before she gets to the wall, she should transition backwards and thrust her ass into the seam.
In order to do this successfully, you must fold yourself in half and propel yourself into the seam, you cannot turn around and attack the seam at a full stand up. It doesn’t work. Snot Rocket Science (Steel City), Holly Go Hardly (Charm City), and Skinny Guinea (Brandywine) are some skaters I’ve seen do this in bouts. I am trying to find gif footage!!
YOU’RE FACING THE WRONG WAY!
Ok, so we love backwards blocking these days. However, many many many skaters use it too much, and incorrectly. If you are backwards, and catch someone, you have two options: 1) Hold that skater until your friends come to your rescue or 2) pop them a bit as you turn around to face normal derby direction [which is where you have more power and control and are less likely to incur a pentalty].
To make the opponent hurt, and give you a second to turn around, you will pair up. The jammer will press into the blocker. The blocker will practice the quick succession of throwing a shoulder into the jammer (as practiced before), turning 90 degrees, and popping the jammer in the sternum area, completing the turn to establish contact with the booty of the blocker. There is no 3rd hit necessary. Shoulder facing the jammer, shoulder at a 90 degrees (at full speed it’ll look like a hockey stop with your feet), finish the turn and establish position. It is quick, it is sharp, and you have to bob with your legs on the second hit a little bit.
TO THE LINE! (PARTNER ASSIST)
In pairs, you will practice a cannonball to the line. I like having one person practice for a length of time and then switching. The pair will start in an ‘unsuspecting’ two wall. The person throwing will push their partner to the line, catch their arm, and keep them in bounds. They will then reset into a two wall. The person being thrown will be loose enough to be thrown, extend the ass over the line as FAR as possible (fold yourself over like when you put your ass through a seam as described above), and keep your skates in legal ground. Immediately reset into a two wall ON THE LINE. Then move back towards the center of the track to do it again.
See video for more explanation of this move!
NOTE: Do not anticipate being thrown on this!! Try and simulate how it would actually happen in a bout. You’re not going to be set up for a cannonball with the jammer approaching, so don’t practice it here.
Crazy Legs Drill
Two lines of cones should be placed about every ten feet in a line, and just wider than the track. Skaters are to ‘lead with their knees’ and move their feet in small, edging motions to get across the track. Toe stops are not to be used (in fact, I would recommend doing this drill during a practice where no toe stops are allowed). This is not a shuffle step, or a crossover. They are small, sometimes gliding, steps and stops where you control your speed and balance with your edges.
Your hips are always facing forward. Once a skater has reached the cone by going across the track, they should move up to the next cone at a diagonal, and use a one foot plow stop at that cone. Try and get as close to the cone as possible. Then, move across the track again. The first time through, the crazy legs should be moving to the right, and they’ll be gliding to the left. Reverse it for the second time through.
ADVANCED VERSION:
Do it again, but this time, keep your head over your shoulder. Pick ONE shoulder to look over the whole time. Move across trying to keep your eyes on that spot behind you for as much of the crazy legs as possible. You can also reach your hands behind you, pretending that there is someone on your back, and you are just making a one second contact in order to know where they are.
The very last gif on this page has an example of the “3 second check”. This is Tony Muse (Peter Pan) of Your Mom executing in perfectly. Look for the gif with the description: The “less-than-3-second-hand-check” rule can effectively widen your wall by up to a few feet on each side. Just be careful it doesn’t turn into a forearm block.
Don’t be a drill dick. There’s a lot of skills in here that involve some practice. Don’t make your two walls ridiculous – make them realistic. No two wall is glued at the hips and body from the moment the jammer approaches, because if they were – the jammer would just go to the outside, and that two wall would be rendered ineffective. Keep some space. These drills are just as much practice for the blockers as it is for the jammers.
Blockers should practice keep their brakes on as jammers challenge them, and keep it challenging (but not asshole level).
Outside of derby: Start lifting weights. If you want to know why, read my blog about PERSPECTIVE SHIFT!
This was a class about getting to the next level, so I gave a similar speech in the class and I will type something similar here:
Roller derby is not always fun.
I know that we like to think it is. We like to tell ourselves that derby is a blast and amazing and fun all the time. Guess what? If you really want to improve, you are going to have to train. If you train, it’s not going to be fun all the time. Getting better is not fun. Knocking a bitch over in a game is fun. Winning is fun. Knowing that you just deadlifted twice your body weight is fun. Pause squats are not fun. Falling is not fun. Persistent sweat, pain, and failure is not fun. However, it is necessary for improvement. I did not get awesome at footwork magically. I simply did things over and over and over. I fell. I pushed. I lifted. I flipped tires. I cried. I bled. I sweat. I bruised.
It is not always fun, and that is ok. If you’re not ready for it not to be fun, than you may not be ready yet to advance to the next level. Everyone has to decide their level of commitment and level of training they are willing to accept. (And sometimes, team mates, you have to be accepting that your team mates may not be at the same level of commitment that you are.)
Go forth and be awesome!! Thank you again for anyone who came to my class at RollerCon 2014, make sure you tell them that you love me and you want me to teach more! If you want me to come to you, or if you want me and DNA Coaching to come to you – drop me a line at DerbyAmerica@yahoo.com … I also am a health coach with DERBALIFE and it has changed the effectiveness of my training. Get with me for more info!
I love this class. I love this class so much, and I will submit it again next year! I hope that it gets on the schedule more than once, because everyone has a blast. The point of this class is to do something OTHER than derby in order to work on fundamental skills.
Many of us get White Jacket Syndrome when we practice plows, hockey stops, edging, etc at training sessions. We have our coaches watching. We want to impress them. We want to get on that next roster. We’re worried about the skills of the people around us compared to our own. These games take that out of the equation. This is great to mix skill levels into, because you’re taking derby out of the equation – so EVERYONE is learning at the same pace. Though advanced skating skills can definitely be an advantage, there is more than pure experience on skates involved for most of these games.
Ultimate Roller Derby Props needed: 2 balls larger than a baseball
Focus skills: Teamwork, communication, awareness, multitasking, periphery vision
This is the game closest to roller derby. Only with an Ultimate Frisbee twist.
Each jam is 2 minutes. Teams field the same players as usual, and we play on the derby track. Each team on the track has a ball. Players on that team must pass the ball THREE TIMES, successfully, between themselves in order to let their jammer try to leave the pack.
The ball must always be PASSED, not handed off and opposing players are allowed to block passes. If the ball hits the floor, or is caught by an opposing team member, the 3 count is reset. After 3 passes are successful, the jammer (and to make it more advanced, the jammer OR pivot) may attempt to break the pack. Your points are counted by how many times the jammer has left the pack.
So yes, when one team completes their passes, the other team should be trying to stop that jammer from leaving the pack!
Duck Duck GOOSE No props needed
Focus skills: Speed, agility, endurance, speed control
While you can play this game in the classic “everyone sit on the floor” way, I like it better when it’s moving.
Get your team into a pace line. I recommend doing this at a moderate speed for YOUR team (obviously London Roller Girls’ All Stars would be able to do this faster than a start-up league). The person at the back of the line goes first to make it easiest. As the advance up the pace line, they call out “duck” for those who are not chosen. When they decide that someone is the “goose” they complete a legal hit on that individual. That begins the race around the track back to the goose’s position in the line.
Beginner version: It does not matter who makes it back to the goose’s place first. The GOOSE is now IT, regardless. They drop to the back of the line and begin playing.
Advanced version: Whoever reaches the goose’s place in line successfully first (as in, they’re in the line and matching the line’s pace), are safe. The other person is now IT and drops to the back of the line to start playing.
I will run this until everyone has been chosen at least once.
DODGEBALL
Props needed: As many balls as you desire. I like to do 4-6 of varying sizes.
Skills: Footwork, avoidance, awareness
Level 1 –
Split your players into two teams. Place the balls in a line directly between the two groups. Blow a whistle to release them and let the dodgeball commence!
Note: I had an interesting thing happen this year during this game. One team hung at the very back of the ‘engagement zone’ because they realized the balls wouldn’t fly that far. If you have players not participating in this way, don’t be afraid to shorten the boundaries they must stay within.
Level 2 –
No one is on a team. Every person is on their own team. Have all the skaters line up at one end (or you can split them into two ends). Those on the sideline each take a ball. The players are told that when the first ball hits the ground, they are released!
You can either play this to the end, or do it until there are 3-5 players left. These players step to the side and then you play another round. Eventually you do a “championship” round!
SOCCER Props needed: A net, or other boundary marker for the two goals. An empty water gallon jug (you may want to have multiples for back-ups).
Skills: Footwork, edging, stops, avoidance, awareness, teamwork, short endurance
This is exactly what it sounds like: you play soccer on roller skates, but you use a gallon jug instead of a soccer ball (the jug does not roll the same way, so it makes the game actually playable).
Level 1 – NON CONTACT!
Level 2 – Legal contact
Feel free to have refs around to regulate things like low blocks, back blocks, illegal contact, and hand balls (it is soccer after all).
I play 5 v 5 and let the rounds go for 4 minutes OR until a team has scored 2 goals in that period. Then you switch out.
Blood and Thunder. King of the Mountain. Queen of the Rink. Last Man Standing. There are a ton of names for it, but in derby most of us have played the game where we all get on the track and hit the snot out of each other until one person remains. This is a version of that.
Everyone starts skating, and when told to go, the carnage begins. When a skater is knocked down or goes out of bounds – they are out. In this version, do NOT have them stay on the track unless you have advanced skaters. You can also have refs calling penalties, and if anyone commits a penalty, they are also out.
With this version, when two skaters connect, if NEITHER skater goes out or down, than BOTH of them must flip to begin skating the opposite direction. Every skater will always skate DERBY direction, it’s just a matter of whether they are forward or backward. You should have people on the outside reminding skaters to spin around when contacted. There’s always one that just doesn’t understand/remember that they have to flip around whenever someone touches them.
This is another game that I like stopping each round when there are 3 people left, so that you can do several rounds, ending in a Championship.
MUSICAL CONES Props Needed: As many cones (minus one) as you have people playing.
Skills: Stops, speed, awareness
Every person playing gets a cone, except for one person. Each person should place the cone on the inside or outside edge of the track. The person in charge decides what stop the round will focus on. You can do an entire game of ONE stop, if you want.
Everyone starts skating at pack speed. When the person in charge decides, they blow the whistle and everyone must get to a cone and use the stop APPROPRIATELY and without falling or advancing past the cone. If they are unsuccessful, a ref or wrangler should call them out and they must go to the NEXT cone and try it again.
Follow me on Facebook: Facebook.com/MerryKhaos1918
Twitter: @DerbyAmerica
Instagram: @Khaos24Fit
And if your league is looking for coaches and trainers, drop me a message at DerbyAmerica@gmail.com – DNA Coaching is currently booking boot camps and sessions and we’d love to talk to your league!
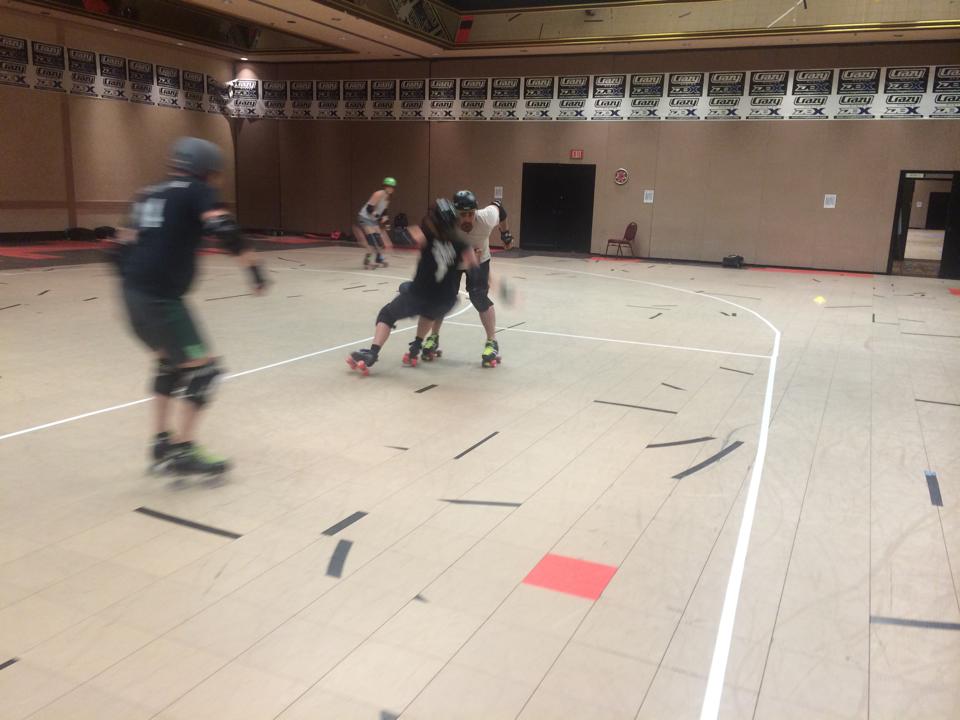
During Blood and ThunderSliding out during Musical ConesDuring Blood and Thunder
I designed this class for beginners and intermediates (though advanced skaters could possibly get some tips and tricks out of it). Often, as you learn the sport of roller derby, there are little pieces that are missed. I’m talking about finesse pieces of the game; so you may be told “become a wall”, but you’re not told to “become a wall pretending there is a skewer through the four of you”. Little details make a skater great, and when you don’t have the little details [that no one told you about], you may be the one on the track getting yelled at by vets.
Before we got into anything we did a review of EDGING. Get into your proper derby form. Feel where the pressure is. Chances are it’s straight down through the middle of the wheel. We want to think about our wheels like the edge of an ice blade. Pushing through your EDGES, instead of the middle of your wheels, are how you get better at carving, stopping, and juking (and derby in general). Move around on your skates and feel where the weight goes when you’re on your edges.
General rules for roller derby that everyone should know and practice:
– DON’T LOOK AT YOUR FEET
– BEND YOUR KNEES
– YOUR ARMS ARE UNNECESSARY FOR ROLLER SKATING. Practice “Bonnie-Thunders-Floppy-Arms”
– GET NATURAL AT TRANSITIONS. Do them and do them and do them. Every chance, for hours, both directions
– DON’T SAY YOU CAN’T DO IT. You can do it, you just haven’t YET
Proper Form
Often when we say “Drop into good derby stance”, people bend their knees, or lean over, and stick their butt very far out. For your form, you want to work on your legs being at 90 degrees, your tail bone TUCKED under your spine, and your back flat and strong. No, you will not be able to maintain this at every moment during skating, but we want you to develop that tucked tailbone and strong back. The legs at 90 degrees will build strength for you to use in skating.
Crossovers
Crossovers are critical to the ability to play roller derby because they are the basis of roller SKATING. You don’t just do crossovers when you are making a lap or going fast, you need to be able to do crossovers within packs, and have the confidence to keep your balance and make the moves during game play. Crossovers are two parts:
STEP WITH YOUR RIGHT FOOT
PUSH WITH YOUR BACK FOOT
If you are bad at crossovers right now, here are things to practice:
– Getting lower: The more leg you have to use, the more strength you can put into your push.
– Balance: Get a big push and then pick up a foot. The one foot glides we do for certifications are there for a reason
– Confidence: Do Drunken Sailor steps. In this drill, you bring your leg as far and big off of the floor as possible, in order to crossover to the ground as far as possible. Then you do it with the opposite leg. When you get good at it, your legs will be making HUGE arches and you will continue in a straight line, despite veering off from side to side as you do your crossovers.
– Back foot push: We have all done the ‘eggshells’ (when you keep all 8 wheels on the ground, and your feet go in an hourglass shape on the floor to propel). With the back foot push, it’s the same idea. All 8 wheels stay on the floor. Your front foot does ZERO work, it simply guides you. The BACK foot makes an S shape behind your front foot in order to propel you forward. Notes on this: Your back foot should not come next to you front foot at any point. If you can’t do it, bend your knees. You have to wiggle your hips a bit to make this happen and it is A VERY DIFFICULT DRILL – especially if your hips are tight.
Two lines of cones should be placed about every ten feet in a line, and just wider than the track. Skaters are to ‘lead with their knees’ and move their feet in small, edging motions to get across the track. Toe stops are not to be used (in fact, I would recommend doing this drill during a practice where no toe stops are allowed). This is not a shuffle step, or a crossover. They are small, sometimes gliding, steps and stops where you control your speed and balance with your edges.
Your hips are always faced forward. Once a skater has reached the cone by going across the track, they should move up to the next cone at a diagonal, and use a one foot plow stop at that cone, in order to move across the track again. The first time through, the crazy legs should be moving to the right, and they’ll be gliding to the left. Reverse it for the second time through.
ADVANCED VERSION:
Do it again, but this time, keep your head over your shoulder. Pick ONE shoulder to look over the whole time. Move across trying to keep your eyes on that spot behind you for as much of the crazy legs as possible. You can also reach your hands behind you, pretending that there is someone on your back, and you are just making a one second contact in order to know where they are.
The very last gif on this page has an example of the “3 second check”. This is Tony Muse (Peter Pan) of Your Mom executing in perfectly. Look for the gif with the description: The “less-than-3-second-hand-check” rule can effectively widen your wall by up to a few feet on each side. Just be careful it doesn’t turn into a forearm block.
When jamming against a wall or individual that you are trying to get around on the edge, it is helpful to start low and end high. This was the best gif I could find, and though she trips at the end, she got all of her points and you can see she was starting to stand up into the block:
The idea is to hug the blocker with your body as you come through. You want to be as close to them as possible so that way they have no space to wind of for a hit. This is not a hit from the jammer, you are curving yourself around the blocker to get by them.
As Jonathan R of NYSE comes in for jammer on jammer action, Don Juan of Bridgetown Menace gets lower, in order to put his foot in front of Jonathan, leverage against him, and stand up to push off. Photo by Hispanic Attack
Pair up and take turns being the ‘jammer’. Do this slow at first; have the jammer start an arm length from the blocker. The blocker should be in a defensive position. When contact is made, the blocker should lean into the jammer. The jammer needs to make contact on the blocker low, leading with the shoulder (NOT THE HEAD), and try to curve around the body of the blocker. It is difficult to do at low speeds, but we are looking for form and the feeling first. You can increase the speed as you go, so that as the blocker is leading in, the jammer has something to hit against. As the jammer makes contact with the blocker, they press into their legs to stand up, leveraging themselves against the blocker, and establishing themselves in front of the other person.
Getting By the Swing
When an opponent is telegraphing that they’re coming in for a hit you have two options: burst past them, or hit the breaks.
Burst past: In your pairs, have one skater take small swings at the ‘jammer’. The jammer’s job is to change their speed the moment before they are hit by hopping forward. It is a burst of acceleration to get them past. I couldn’t find a gif. But watch Quadzilla of Puget Sound skate, he does it often.
Hit the Breaks: The swings will continue here, but this time, instead of the jammer bursting past the blocker, this time you will practice coming out of your derby stance, and (essentially) standing straight up in order to let the blocker swing by you. The goal is not necessarily to hit your toe stops, you are just putting all your weight into your toes to slow your momentum.
DISCLAIMER: Even when you’re good at this, sometimes you misjudge and you end up with an ass in your quadriceps and it hurts like hell. Often, even if they hit you, they will continue to move past you, however, so you can then begin running like hell again and escape them.
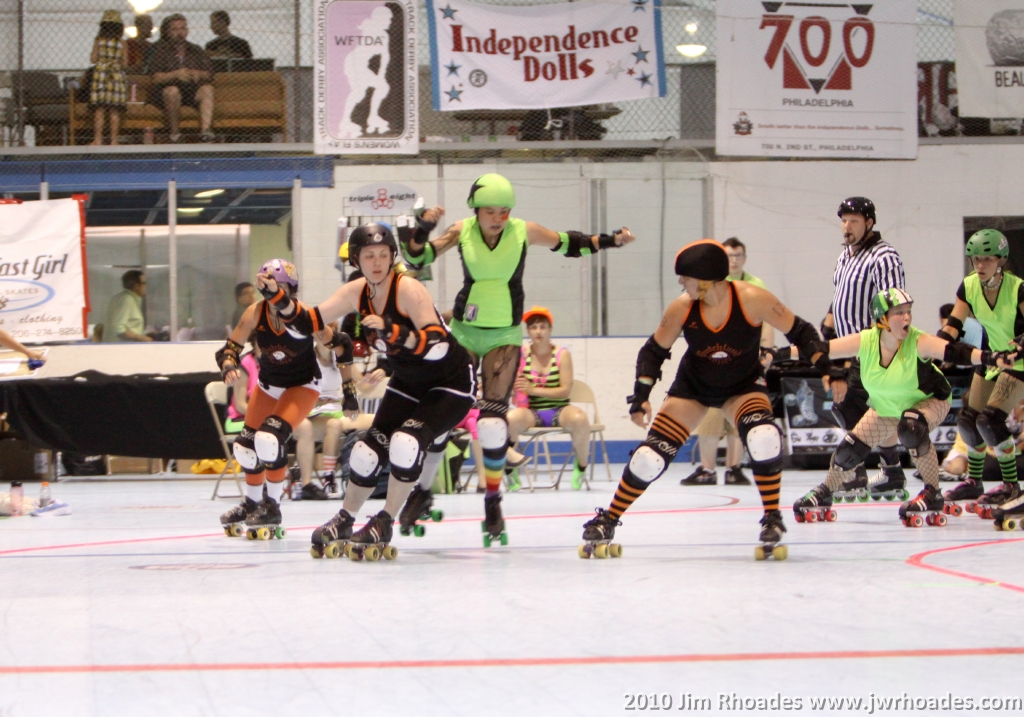
Hit the Breaks and Hop: This time, instead of the jammer just stopping dead in order to let the blocker swing by, they are going to hop the other direction, parallel to the blocker’s motion. So if the blocker is swinging from outside to inside, the jammer will hop from outside to inside. The jammer wants to be as close to the blocker as possible when they do this. These are last ditch moves.
As the Dutchland blocker moves to the outside, Rainbow’s Revenge hops to the in, where a huge hole is waiting for her. Photo by Jim Rhoades
Roll Off of Hits
This is something you see often in derby now, but no one tells you how to do it. Look at Mace as she rolls off of the hit by Akers:
In your pairs, start with a ‘jammer’ who will be moving around the blocker. Do this first at a standstill so skaters understand the physics behind it. The jammer will be tight to the blocker, the jammers’ shoulder against the blocker’s shoulder. The blocker needs to offer resistance, and the jammer is to snap their hips perpendicular to the blocker and push through their outside edges of the back foot to propel around the blocker.
Jammers want to keep contact through the push. This is a way to use the leverage of another skater to get them through on an edge of the track OR if a blocker has caught the jammer, and the jammer is trying to move around them. After both players have practiced this in slow mo, have them do it moving.
Blockers will use their shoulders to put a player down, or knock them to the side or out of bounds. Jammers can use them to break walls. Please note that if the blockers you’re coming up against are bent over (that is to say, there is no back to nail), than this is not a useful technique.
To practice using your shoulders independently of your arms, start by grouping into three skaters. Have two skaters sit on the floor back to back, tight. Then, the third skater should sit down, their spine in the gap between the other skater’s arms. Their legs out, it should look like a T. The third person should then practice her can opener hit by throwing her shoulder backwards (one side at a time) into her partners. After some time, have them rotate. This will help skaters learn how to JUST use their shoulders and if they can do it backwards, they can do it forwards.
To practice breaking through a wall, have two skaters form a wall and the third is playing the role of jammer.
NOTE: When doing drills like this, the walls should be tight, but not ridiculous; especially when a skater is just learning the skill. We want everyone to get reps in and know what a successful rep is like. As they improve, the wall can get tighter and more challenging. This falls under Rule #1 kids.
Jammers will hit the LEGAL piece of the wall with their shoulders to break open a gap and stop through. Blockers need to be engaging their core, tucking their tailbone and giving their jammer a strong back to hit!
See Through the Hole
Have a wall of two blockers, and one jammer, for this. The goal is for the jammer to make as LITTLE contact with the wall as possible. Start this drill at a standstill, with the jammer tight to the wall to replicate a jam start. Jammers should focus THROUGH the wall, not looking at either of the blockers. They should then work making their bodies perpendicular to the blockers, and side step through the wall. It’s most effective (I have found) by focusing on edges, but utilizing toe stops to push out and away from the wall.
Once you do this for a bit and become successful at it, have the wall roll, and let the jammer get a little bit of speed to try this. Again, at first, the wall should be tight but not impossible. As people get better at this, the wall can become tighter. Remember, this is NOT A HIT.
CREATING SPACE WITH BLOCKING
That two wall is now going to get hit by the jammer. Just like with the last drill, you will do this first at a standstill, then moving. Up the intensity as you see fit for your own team. For all of these, you want to start close to the walls. When you do them rolling, the jammer can get a little space.
Hit in the Ribs
Have the jammer aim for the “notch” that exists in every body. It’s approxiametly where the natural waistline is/the bottom of the rib cage. The jammer should be starting low, and completing this sharp, strong hit by pushing downwards into the floor as hard as they can, in order to launch into the ‘notch’, as they move their feet to get through the small gap created.
Hit in the Hips
This time, jammers will not be starting super high. Sometimes when blockers line up, there is a bottom that is sticking out of the wall a little bit. You want to aim for that with your hips. Jammers should practice stepping forward and into the wall in order to hip check the exposed ass out of the way. You are essentially stepping through the wall and assisting yourself through with one sharp, well placed hit. When the blocker is moved, the jammer should then quickly finish stepping through the hole.
Goosing the Line
Disclaimer: Not for every jam!! Not for most jams, actually. If you do this moving, do it slow at first.
Here is your target zone:
Look at how much ass is available! Photo by Jim Rhoades
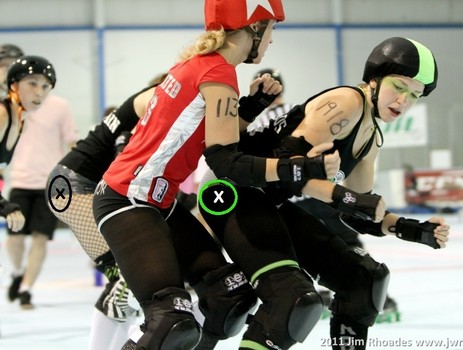
If you are having a hard time breaking through a wall, or you know that you are coming up against defenders who have beaten you and you need to play the ace in your sleeve, this is it. You use the boniest part of your shoulder, as you are in a deep squat, and then aim to the fleshy part of the SIDE of the blockers ass. This only works if there is a significant piece exposed. There are a bunch of nerves in the ass, and if you strike it sharply, you’ll get a reaction from the blocker. Yes, it’s legal, as long as you hit where the Xs are (not the tailbone!). Make sure to keep your head out of the way. If you’re using your right shoulder, tilt your head to the left as you strike.
PHEW. I think that’s it!!! If you took this class at RollerCon and you know that I missed something, please comment on the blog so I know and so that others can see it too! I’m sorry that it was so wordy, but I wanted to make sure I explained thoroughly for anyone who didn’t get to come to the class. I hope you enjoyed it, and make sure you tell RollerCon in the feedback form that you want to see more classes with me next year, and make sure you like my athlete page on Facebook. Also, DNA Coaching is booking boot camps all the time! Contact me at DerbyAmerica@yahoo.com if your league would be interested in hosting us.