To pivot line, or not to pivot line … that is the question:
Whether ‘tis nobler in the mind to suffer
The speed and angles of outrageous jammers,
Or take direct hits against a sea of blocks
And by opposing [hopefully] stop them.
Soliloquy aside, it seems like every time blockers step on the floor between jams now, they ask themselves “No seriously, where should we go?”
The answer is inconsistent and often comes with groans from one or more players on the track. How did we get here, and what does this all mean for the newer derby player?
Come children, gather around the Snapchat, and let me spin you a tale of a different time.

Let’s remember that our sport is still under 30 years old, and most leagues that exist aren’t old enough to legally imbibe in the US. The sport has undergone rapid change and development in that time, more so than other sports since we have the global sharing of knowledge known as the internet. At the beginning, tactics spread slowly and took time for adaptation. Now teams of 20 in New Mexico can see what is happening from top coaches in Europe at any time.
The sport was originally very fast, and focused on space and forward momentum. There were two starts to a jam: one whistle to release the blockers, a second set of two whistles (like lead jam) to release the jammers. Jammers would only be released after the last blocker passed the pivot line (or one other scenario but let’s pause on that). Blockers were fast, so jammers had to be faster.
Lining up at the pivot line was advantageous in those days because the quicker you released the jammer, the quicker you could earn lead and score points. Pivots would fight for their toe on the pivot line because blockers have to establish behind the hips of a pivot in that position (still do). A pivot in a superior position from the start could run away faster, and control the speed of the pack. Derby generally moved at a racing pace as a result. Blockers had to be fast, jammers had to be ungodly fast.
This was not just because of the rules, but because honestly, most of us were not very good at skating or control back then. With little experience, you could still be successful while skating fast in a straight line. It’s way easier than the cuts, edgework, and mobility that we see today from all positions.
And star passes? I think I saw 4 total between 2009 and 2012 (and I watched a LOT of derby y’all).
Then in 2010 there was a thing introduced that changed everything: the Knee Down Start (KDS). I saw it the first time when Gotham Roller Derby did it at ECDX (I believe against Philly). High level teams figured out that the jammers would also be released if there was a no pack called, and they challenged the idea that you had to start so far away from their jammers.
If the pack is closer to the jam line, and the jammers are released right away, you have more opportunity to gain lead. ESPECIALLY if the other team is not used to the strategy and spends the whole time going “What is happening?” And further if you utilize good roller skating to keep the game slow, so that your ungodly fast jammers can just do laps instead of having to catch up to a pack.
EVOLUTION BABY
KDS became so popular that WFTDA quickly removed the two whistle starts, thus removing the need to start on the ground. There are so many more strats and reasons and background but let’s just say that KDS were a brief, but vital, moment in time for the sport.
Great, so now we all start on the jam line. Now we jockey for who can be closest to the jammer to contain them at the start. So for a minute there we all fought for the BACK line. Not every jammer (It’s me, hi, I’m the problem, it’s me) loves having to avoid their team before encountering the opposition.
So now we have people starting on the pivot line in order to force the other team to be on the back line, because ALWAYS blockers would roll back to the back line on 5 seconds. Why? It’s what we did, it’s what we were comfy with, it’s what we were told we should do, and we also were told, “Well if you roll back than the other team has to adjust to you.”
Now we’re back. History class is over, and it’s time to head into Game Psychology.
When lining up as blockers you have an array of decisions to make for your initial placement. My favorite way to have people line up on game day is HOW YOU PRACTICE LINING UP. Don’t get weird until either 1) You’re way up or 2) You’re way down.

Advantages of starting at the Pivot Line:
- You have the ability to run away from jammers & other blockers. This is especially helpful if you are defending a power start where your jammer is standing.
- You are close to the turn, which is helpful when ON a power start and you want your jammer to have more space to move.
- Occasionally you can catch someone on a false start or Failure to Yield by doing the Pivot-touching-the-line trick if they are unaware of their hips & the rules.
- It can freak out a jammer that’s not used to having space to run.
- If you have a fast & powerful jammer it gives them a head of speed.
Disadvantages of starting at the Pivot Line:
- Very close to the corner when you start. In order for a run tactic to work when defending on the power start, you have to be able to guarantee that all of your blockers will be faster and more evasive than the opposition. If someone gets picked off, the opponents now control the pack in the turn, where your team is split up.
- If you’re on a power start and you start at the line, but the other team does not move forward with you, you risk a Destruction Penalty AND your jammer will have a regular wall to contend with.
- If your team doesn’t know the Pivot-touching-the-line trick, you may lose someone to the box.
- It can freak out your jammer if they’re not used to seeing this arrangement.
- If the other jammer is a powerful or super agile, you may not be able to stop them as easily when they get that full head of steam.
What else can happen when you’re starting on the pivot line?
- The other team can say “Nuts to this” and draw back to the back line.
- The other team can say “Nah” and go HALFWAY back.
- The other team can say “Raise you” and establish on the pivot line, forcing your blockers behind them.
- The other team can position themselves to box in your blockers after the first whistle, abandoning the classic line formation.
Some of the fun of derby is getting to deal with these various scenarios as a collective group of individuals. It’s why a Pod System works well for many teams – if you can get like minded blockers working together consistently, when things get weird (and they will), everyone has a similar mindset of how to contend with it.
So what are some options when the other team changes it up?
If they draw all the way to the back line, you can stay or you can follow. Easy enough.
If you follow, YOU MUST COMMIT TO IT. You don’t want to be caught halfway, or still moving backwards when the start whistle blows. Chase back, set, smush, derbz. If you don’t follow, make sure your whole team is on board and at that Pivot Line; no one halfway. Let the opposing team be on the Jam Line, you stay on the Pivot Line.
The whole pack AND your jammer must be mindful of the No Pack scenario that is about to occur because of the pack being split at the start of the jam. During a No Pack, no one can meaningfully engage in a block AND the back pack must make an effort to reform. The temptation is for your pack to jump backwards when they hear the No Pack Call, however you need to give it a beat.
Your jammer can take this opportunity to come through the pack as long as they don’t hit anyone significantly off balance while doing so in the No Pack situation. Since the blockers are also not allowed to engage impactfully they can’t blast your jammer either.
Can they be moving forward to reform and still position in front of your jammer? Yes, as long as they are doing so while reforming. A No Pack is not a guarantee that your jammer goes unhindered, but often the blockers will be too busy putting their hands in the air to make an effort to disrupt your initial pass.
Doesn’t that mean we, at the top, ALSO can’t meaningfully engage during a No Pack? Yes. Do we HAVE to make an effort to reform? No, we simply cannot skate forward.
By the time the opposing jammer reaches the pivot line, there should be a pack from the back players scooting up. However, if they do not, a Failure to Reform will be called. Make sure one of your blockers is assigned to keep an eye on this so they can drop back to reform the pack before the jammers hit so the other blockers can engage.
SPEED CHESS! Isn’t it fun? Y’all keeping up?
What if the other team decides to start halfway between the Jam Line and Pivot Line? That’s kinda weird honestly. They either are very unsure of what they’re doing or

To find out if it’s a trap, drift backwards a bit. If they respond, it’s probably a trap.
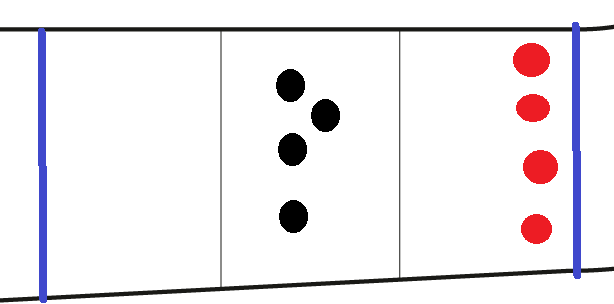
I’m a big fan of keeping my pack at the Pivot Line regardless, and waiting for the jam starting whistle. The moment it happens, have a solo drop for an offensive clear on the line, while your other three blockers come backwards in a tripod formation to catch the opposing jammer as they clear their own blockers.
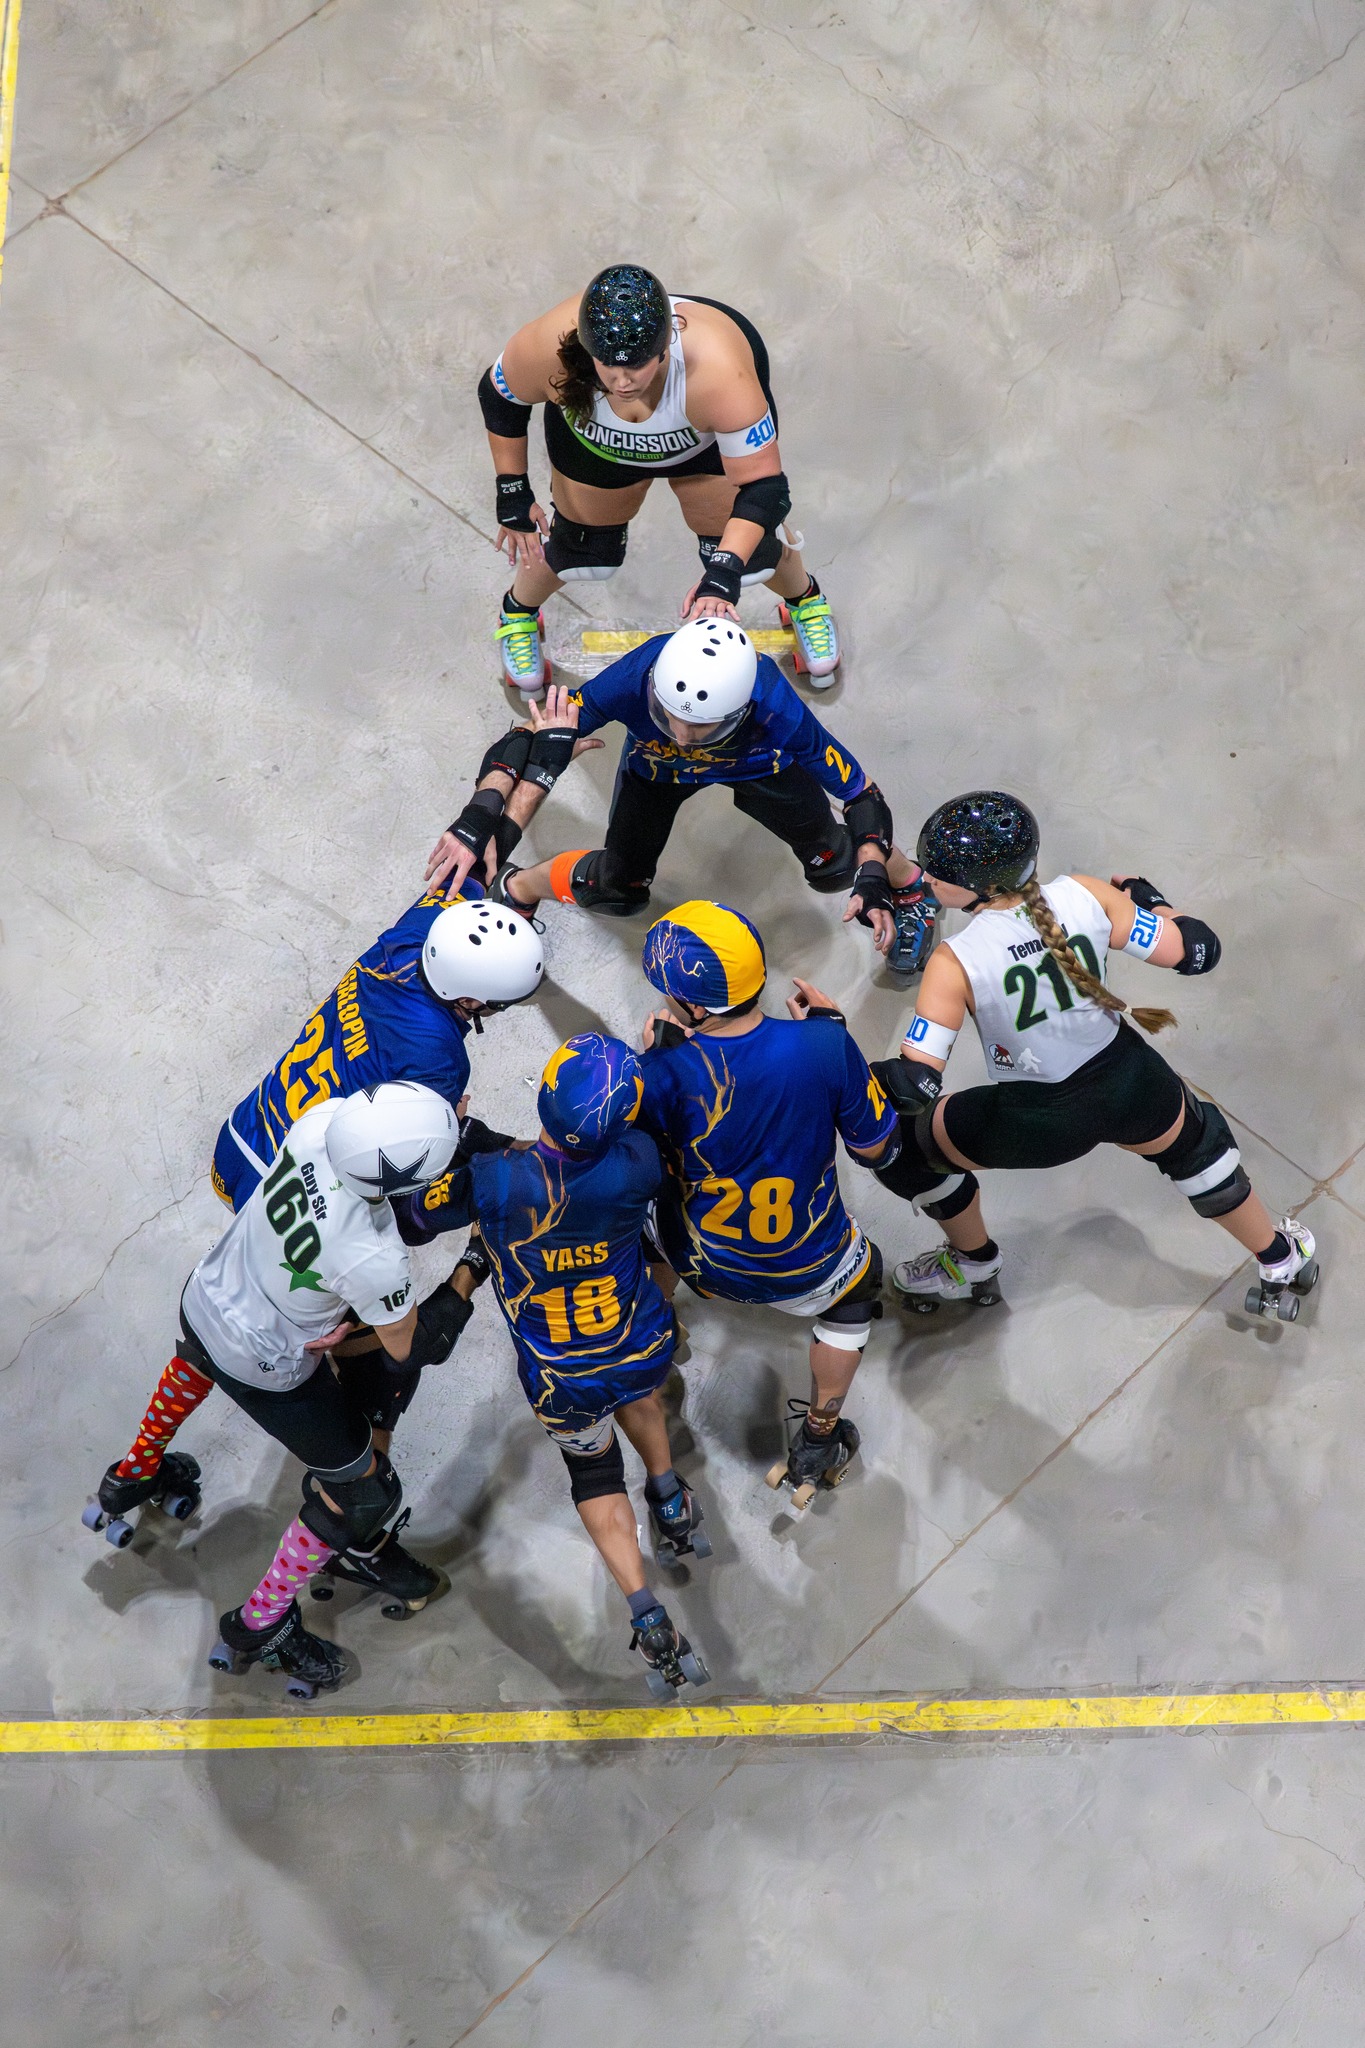
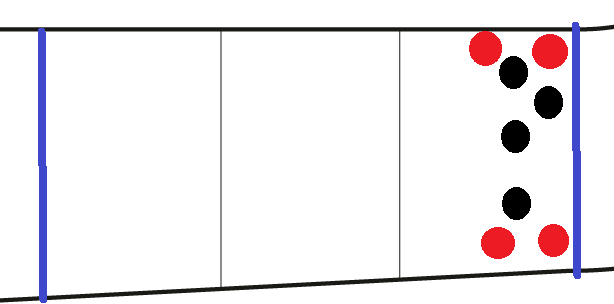
Another fun option is, after the whistle, have the whole pack drop back and surround the tripod in an Old School Funnel Cake. Like this:
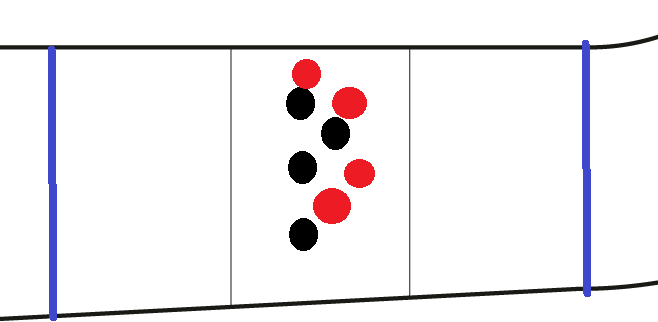
This is a quick offense for your jammer, while giving your blockers the opportunity to use the opposing team against their own jammer.
If they fight you for the Pivot Line, if you fight back, then we’ve got some Off to the Races 2010 Style Run derby that is not great for the longevity of your jammers. Effective for a box clear, not effective for long-term successful derby.
The other option is to drop back into a regular formation further back. If you go halfway to the Jam Line, congrats! You’re setting a trap! If the other team follows you and sets up a press at five seconds before the jam start whistle, then you drop back to the Jam Line at three seconds.
Finally [at least in this piece] there is the option of the other team boxing you in. With Four Corners, the goal is to take the Four Corners of the opposing team and at the right time, smush.

If you do nothing with your positioning, some of you will get smushed, even if you try and jump at the Jam Start whistle. The front to opponents are positioned in a way to pick off two of your people. So once more, you are faced with the choice: Drop backwards or run forwards?
If your team is not well practiced at quick start & stops, running forwards will likely put you in the bad position of being slightly split up in the corner of the track; which is a jammer’s feeding ground.
If you drop backwards, do so at the last moment to prevent the other team from just resetting into Four Corners but with MORE space.
So To Pivot Line or Not to Pivot Line? It still remains the question. Getting “The Front” is not always about establishing yourself at the Pivot Line itself, but about being in front of the other team at the jam start, and using the Pivot Line is a handy way to do that.
As a team, or more specifically, as a Pod, you need to decide if you’re going to just take the back line regardless, or if you want to try and establish yourself up front. This is not just about your strengths, but also your jammer, if there’s anyone on either side in the box, game timing, and how well y’all are vibing in that moment.
Hopefully this quick glimpse into one part of the Psychology of Blocking has resonated with you in some way. Drop notes, thoughts, insights, or what I missed down below. Do you like this sort of blog? Should I do more?
Follow me on Instagram too for instruction videos when I have the spoons!